Adobe Captivate 2019 – Creating Custom Mute and Unmute Audio Button Using Advanced Actions and Variables


Step 1:
To begin, insert two icons for mute and unmute state.
Step 2:
Define a unique name for the mute and unmute sound actions.
Step 3: Create a new variable from the Project menu.
Step 4: Select Add New.
Step 5: Give a Name to it and click Save.
Step 6:
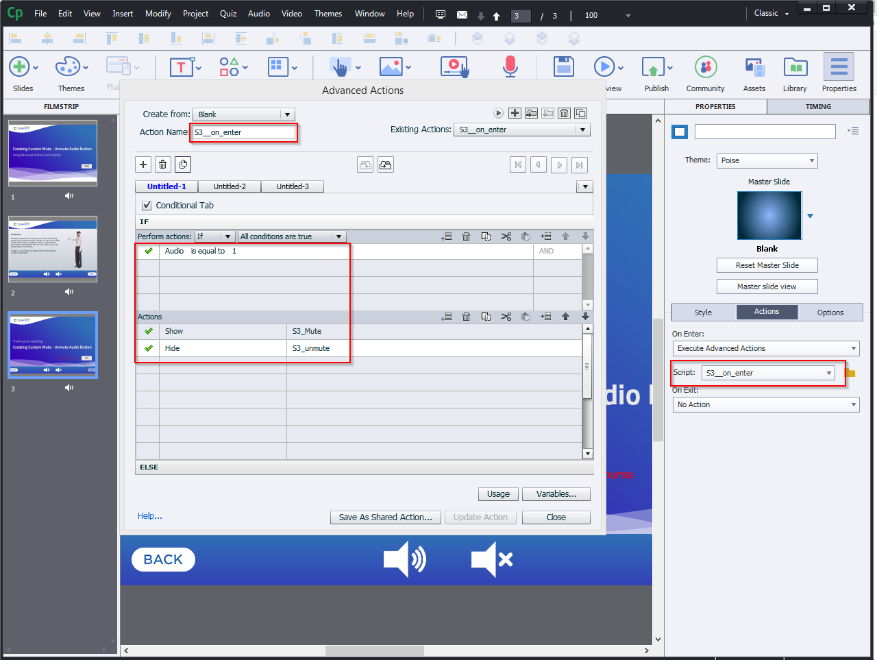
Now go to Execute Advanced Actions and follow the variable and actions as highlighted in the below-given screenshot.
Note: When choosing the Unmute for audio, set the variable to 1.
Note: When choosing the Mute for audio, set the variable to 0.
Step 7:
Finally, we need to add actions to on-entry for the state selected by the learner on the last screen.
1. We are giving trigger in If filed – if variable Audio is 1 then Show: Mute button and Hide: Unmute button.
2. Then we are setting trigger in else filed – as if variable Audio is 1 then Show: Unmute button and Hide: Mute button.
Step 8: Same we need to follow for all screens.


 Top 5 reasons to choose Articulate Rise for your Rapid eLearning Developmen...