Customizing Print Result Screen in Articulate Storyline
Articulate Storyline allows the feature to take print of the result screen. But Storyline doesn’t give an option to customize the branding of the result screen. It is possible to customize the results page using HTML and CSS.
Here is the plugin which is compatible with Articulate Storyline 2, Articulate Storyline 3 and Articulate Storyline 360. In this blog we will demonstrate how to customize the result screen.
Step 1:
Download the plug-in from the given sample at the bottom.
Step 2:
After downloading, navigate to the location:
Storyline output\story_content\report.html
Replace the “report.html” file with downloaded file.
Now, let’s see how to customize different sections of the result page. Open the downloaded file “report.html” in a text editor tool.
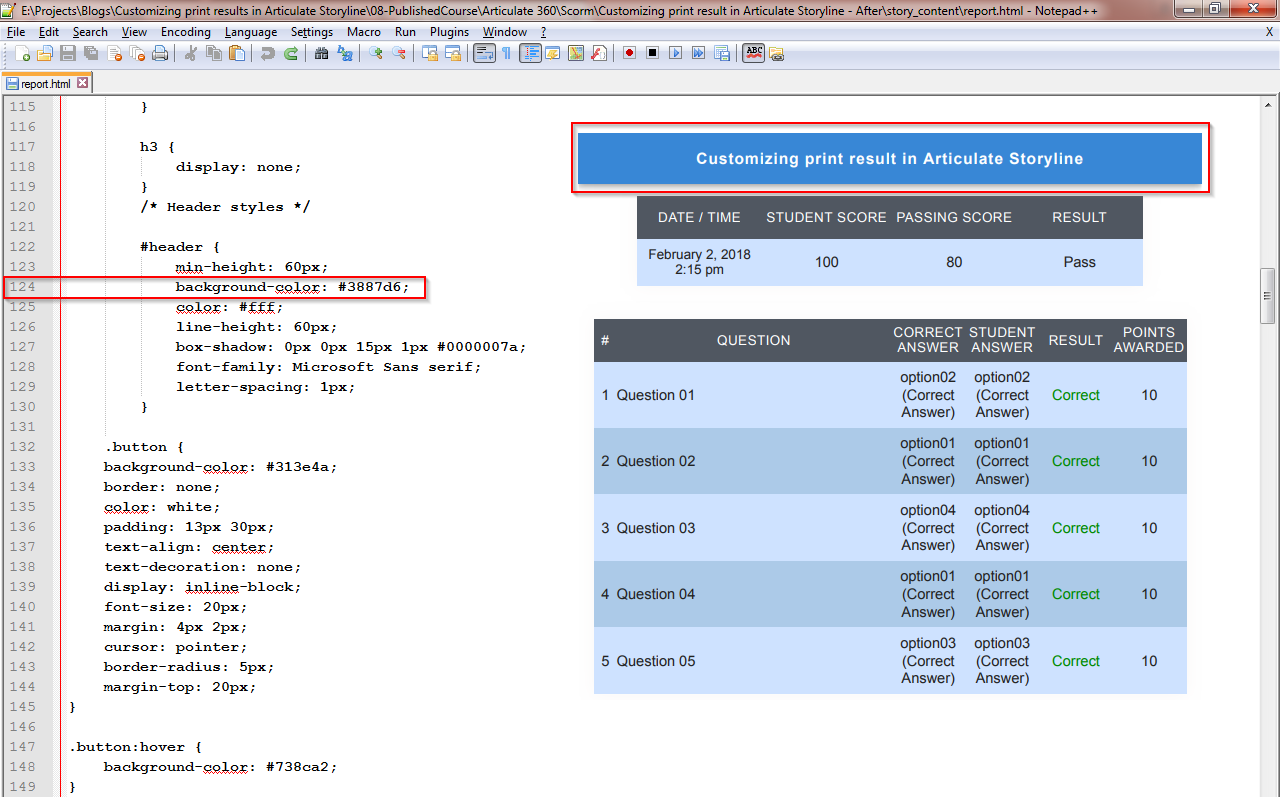
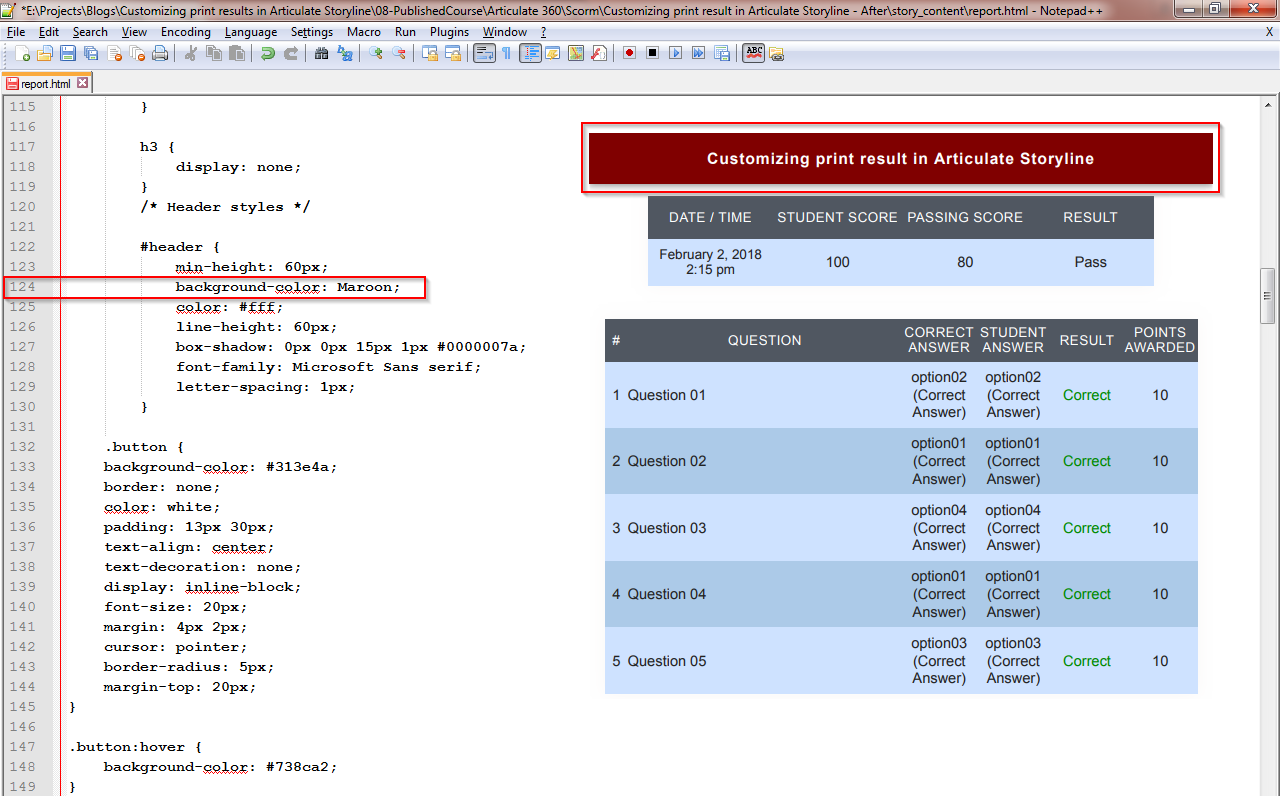
Changing the Title background color:
Navigate to line 124 and change the background color.
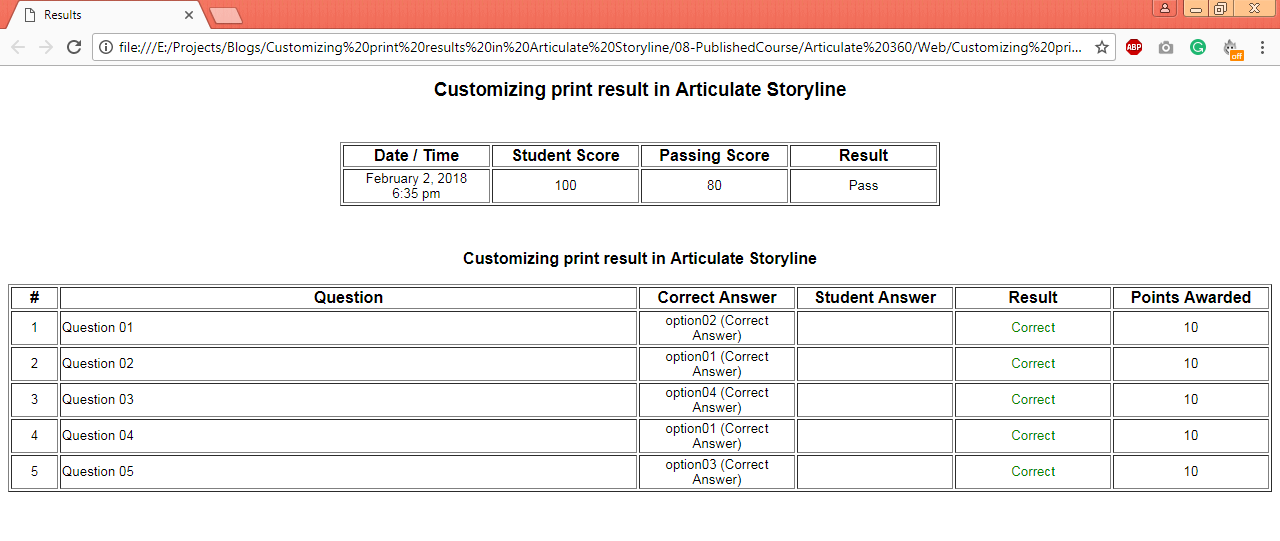
Before:
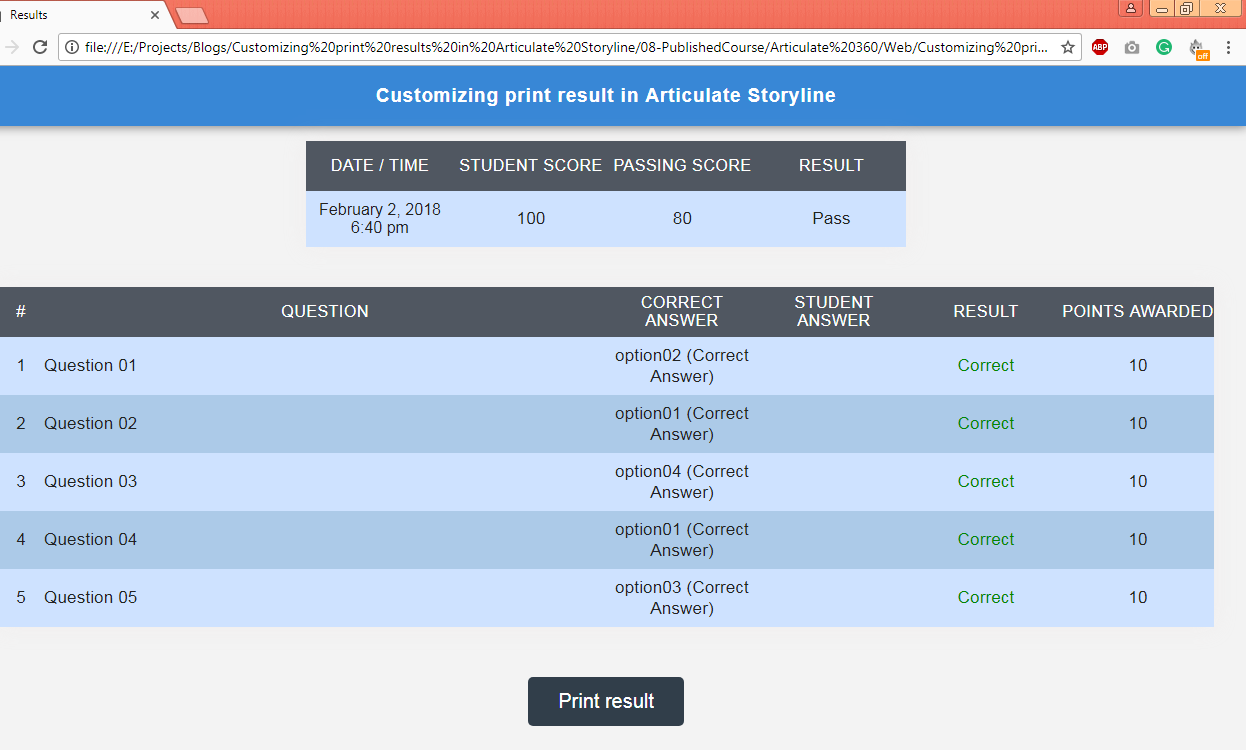
After:
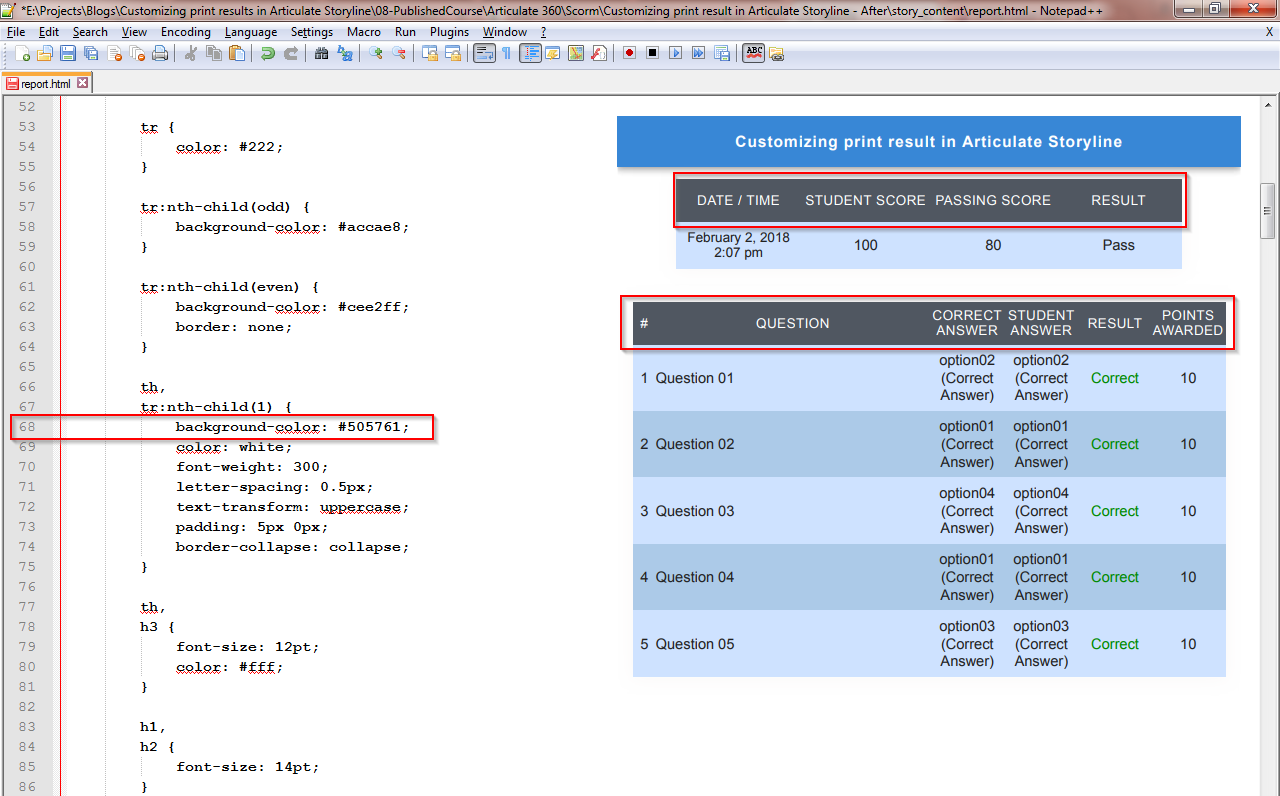
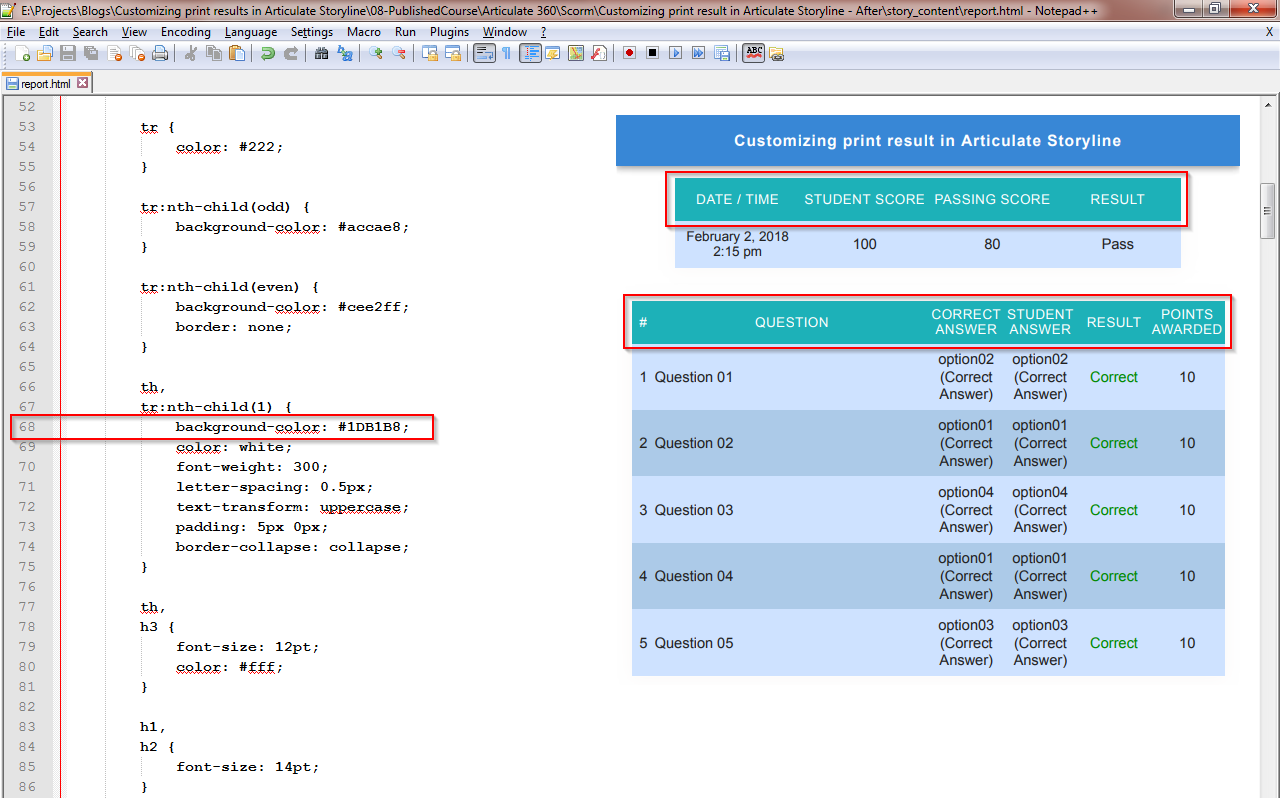
Changing the table header background color:
Navigate to line 68 and change the background color.
Before:
After:
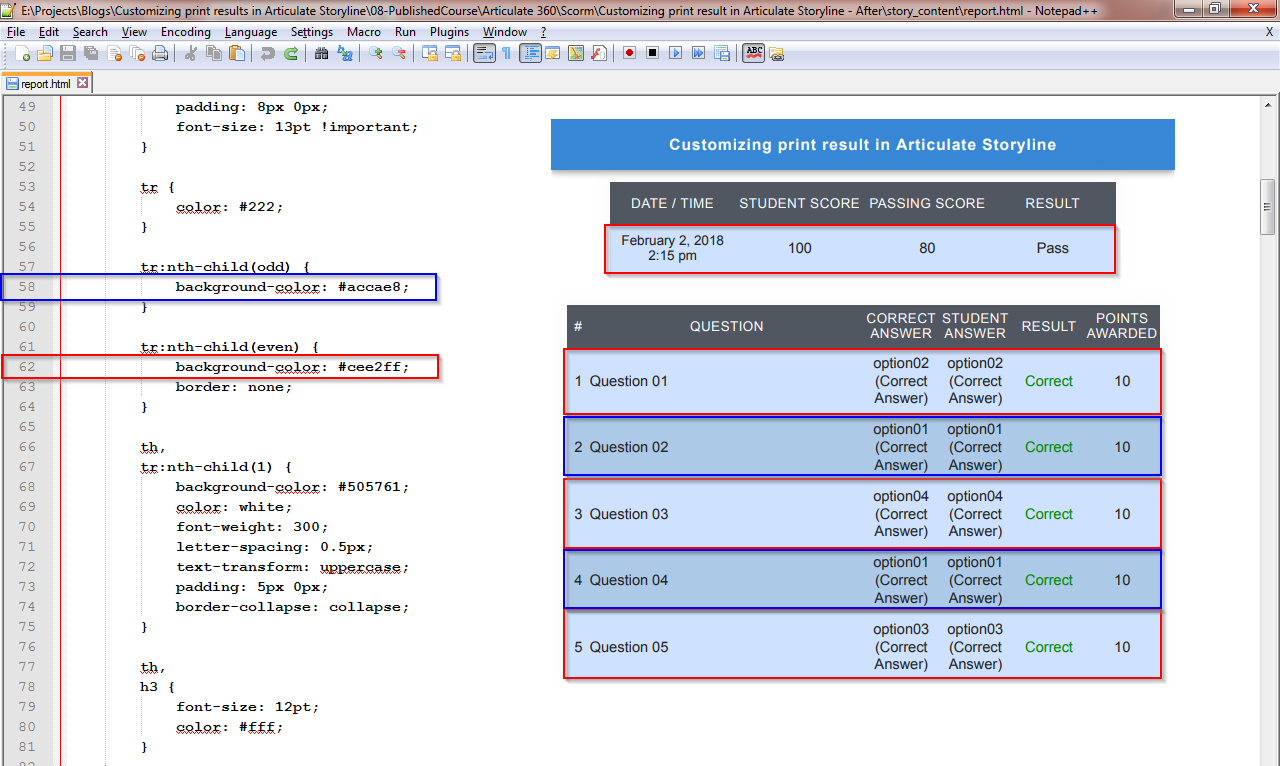
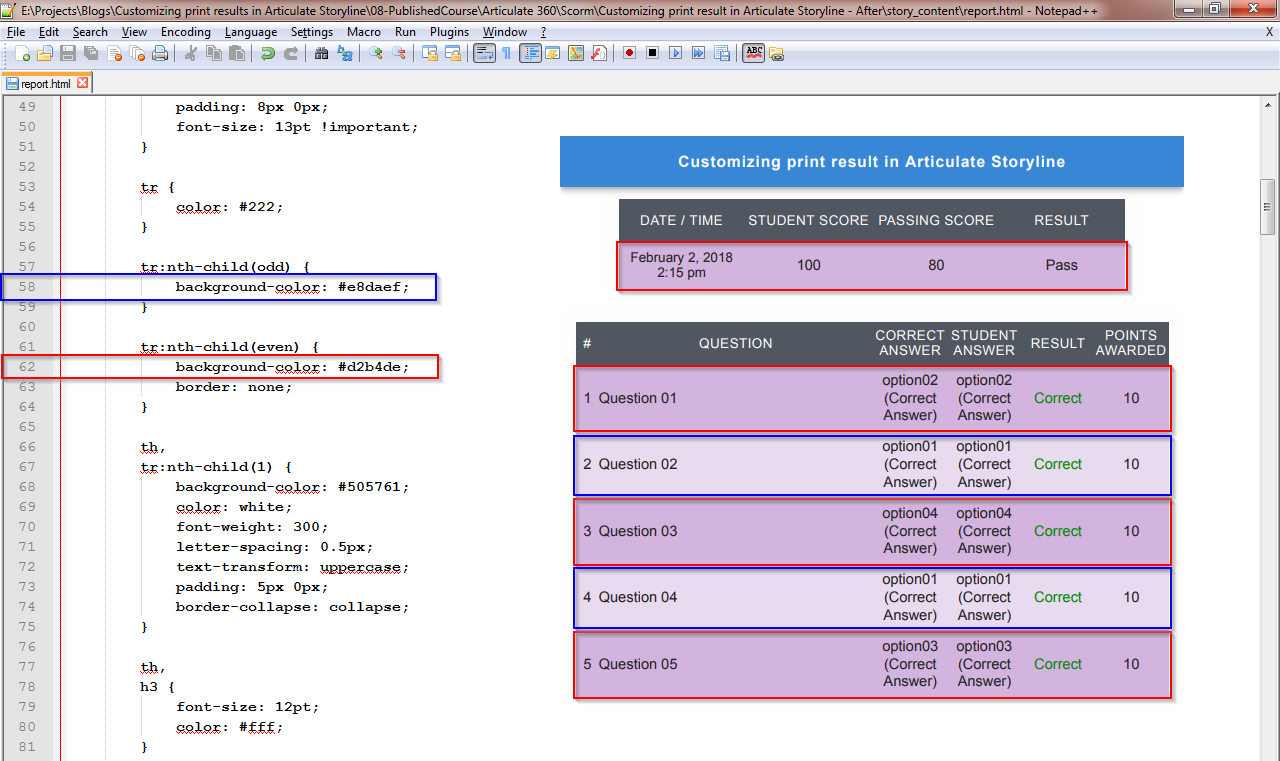
Changing table row background color:
Navigate to line 58 and 62 to change the background color.
Before:
After:
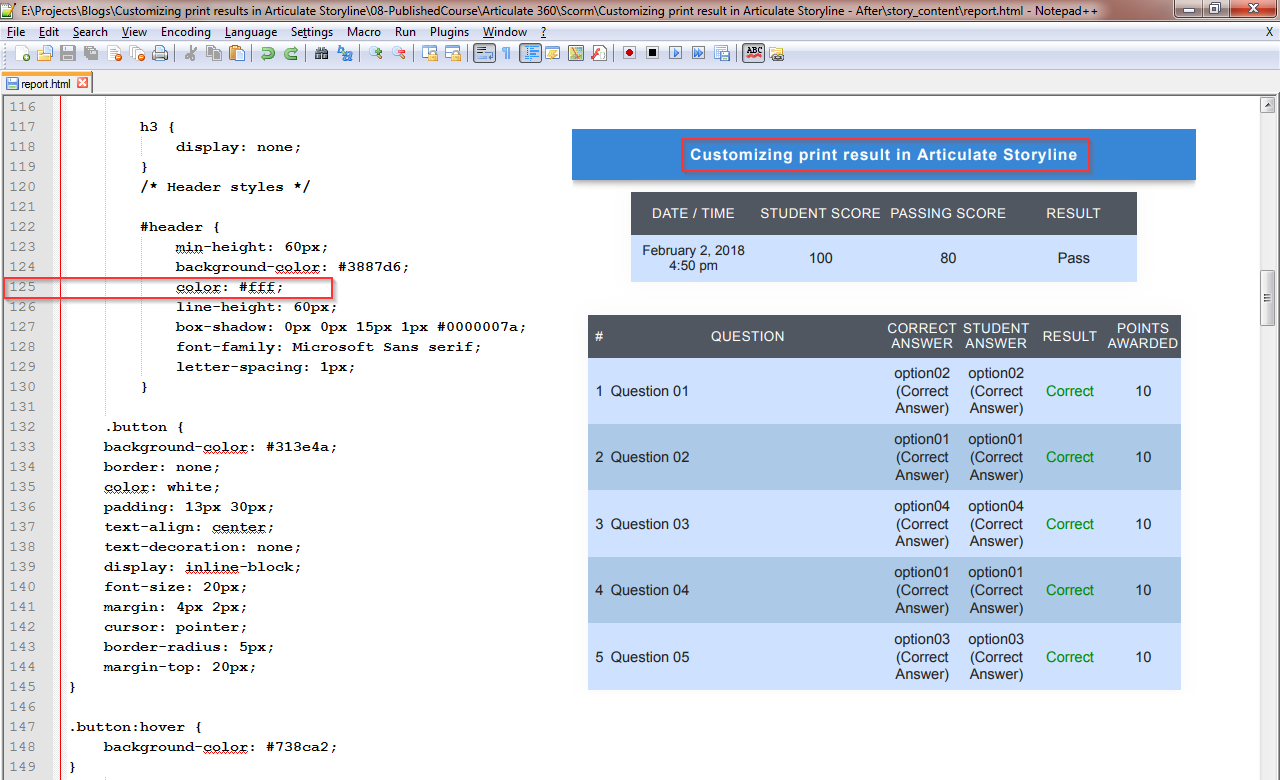
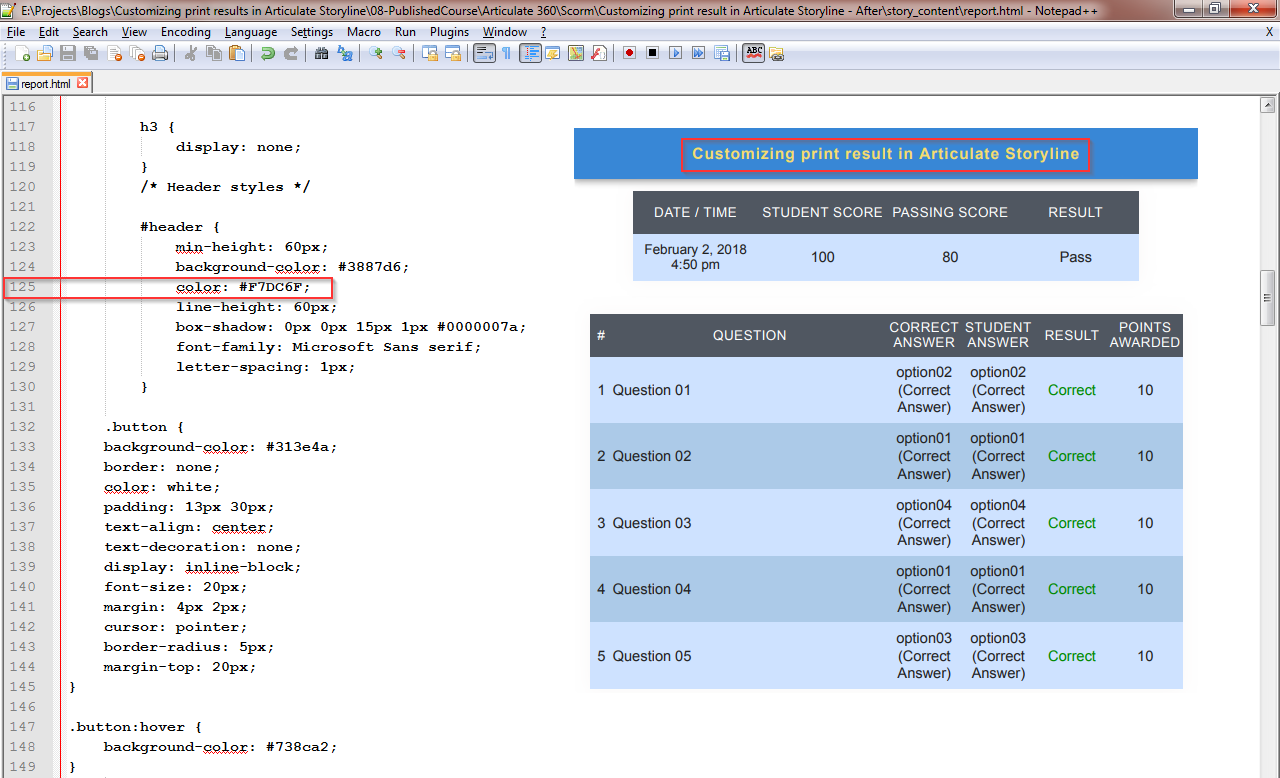
Changing title text color:
Navigate to line 125 and change the text color.
Before:
After:
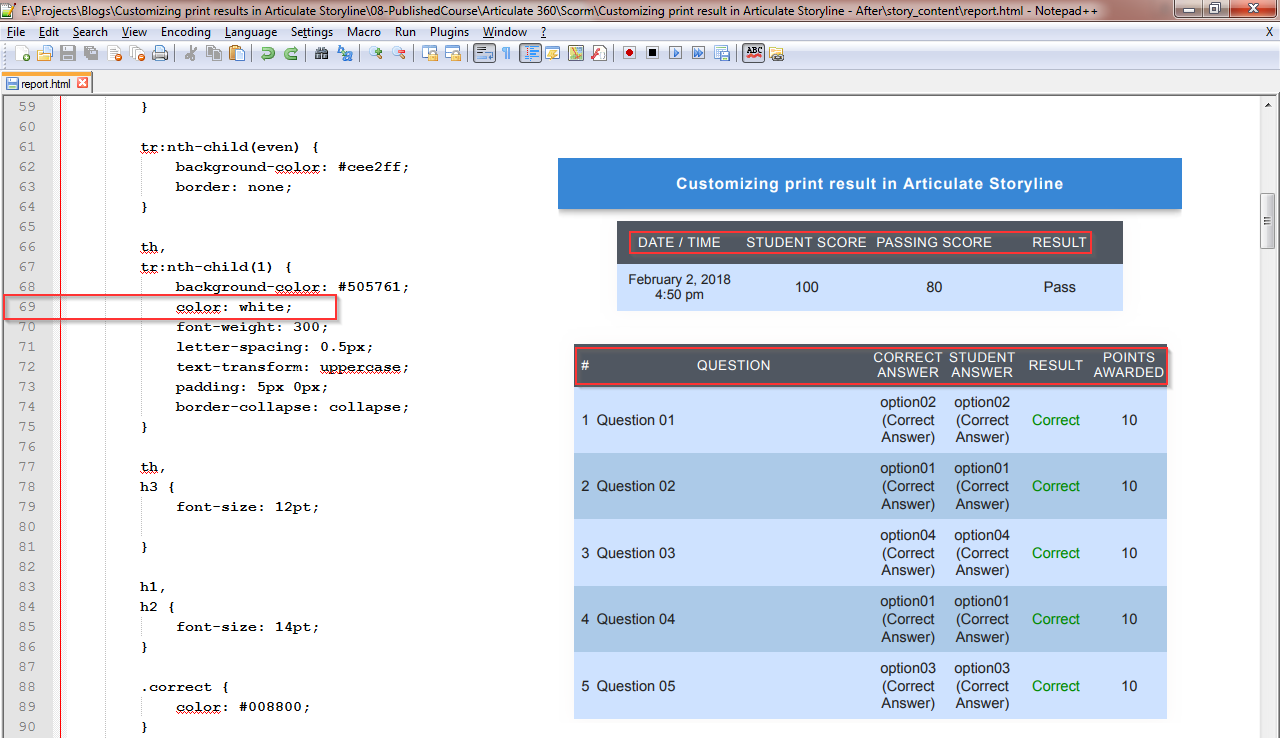
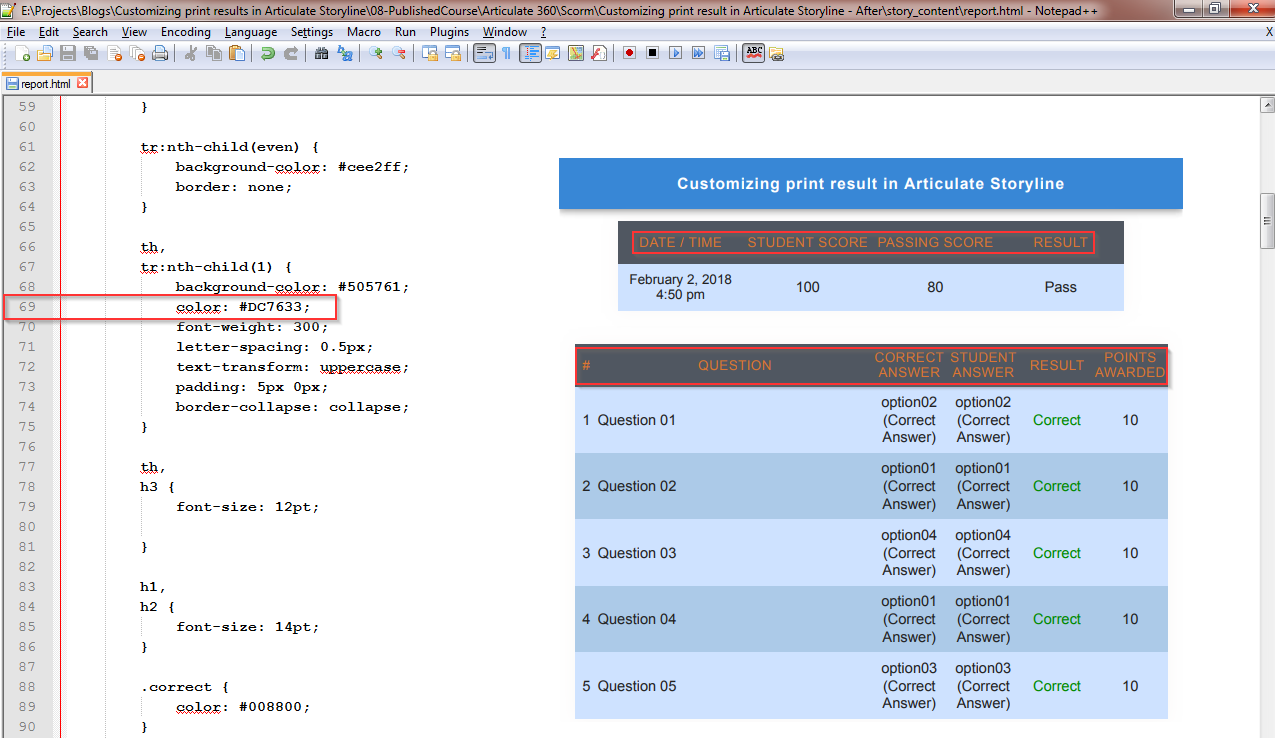
Changing Table header text color:
Navigate to line 69 to change the text color.
Before:
After:
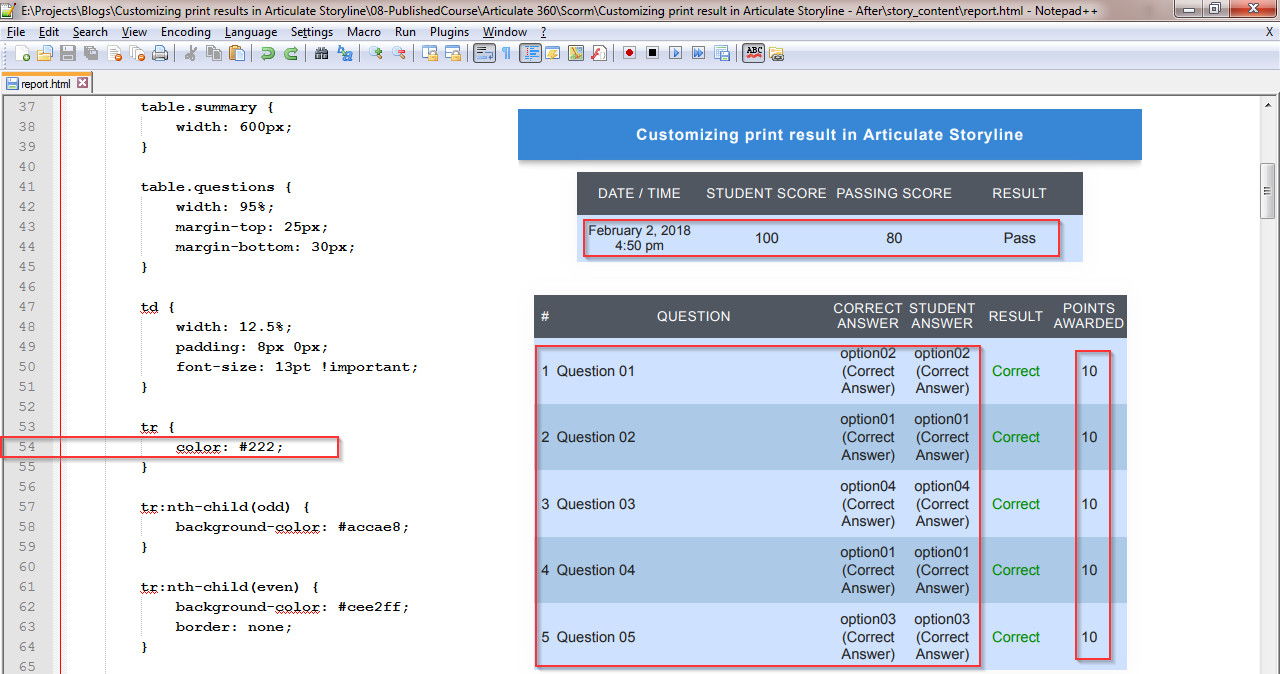
Changing table row text color:
Navigate to line 54 to change the text color.
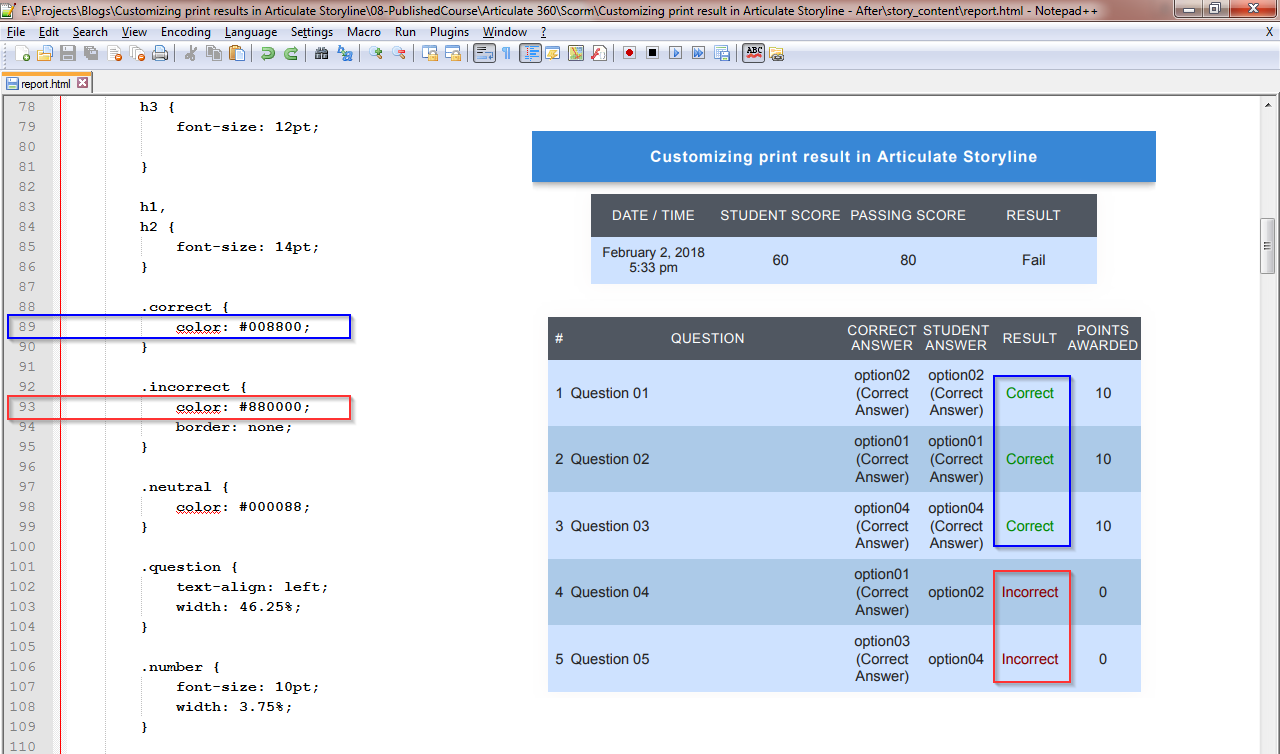
Changing the “Correct” and “Incorrect” text color:
Navigate to line 93 to change text color.
Note:
This code doesn’t work in offline mode or on local drive. You can upload the course on server or LMS to see the output.
Our Services: Custom eLearning Development, Flash to HTML5 Conversion Services, eLearning Company

Leave a Reply
Want to join the discussion?Feel free to contribute!