How to Convert Text To Speech Using Articulate Storyline 360?

Text-to-speech-in-Articulate-360

In Articulate Storyline 360, a new feature is introduced which is “Text-to-Speech”. This feature is helpful in two ways:

  1. To keep the project cost low, machine-generated audio can be used. Just need to add the audio text or the Closed Captions, and machine-generated audio is ready.
  2. In an eLearning project, the standard process to record the human voice is once the project is fully approved by the client. In the client review phase, if the course has to be presented to the client using machine audio then the audio has to be generated using another software and then import it in the course. Whereas in Articulate Storyline 360, “Text-to-Speech” takes care of generating machine audio.

In this blog we will demonstrate how to convert text-to-speech using Articulate Storyline 360.

Step1

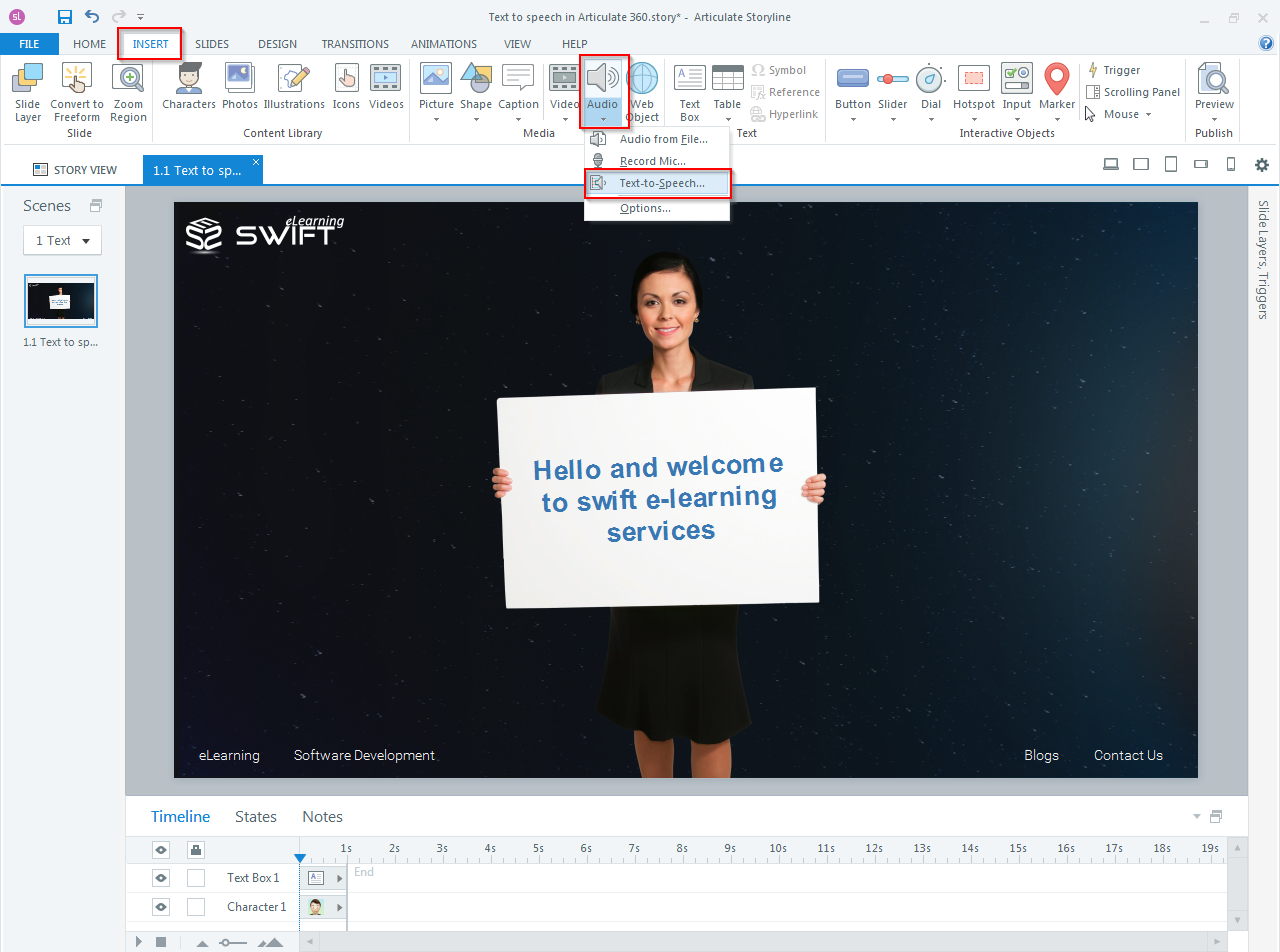
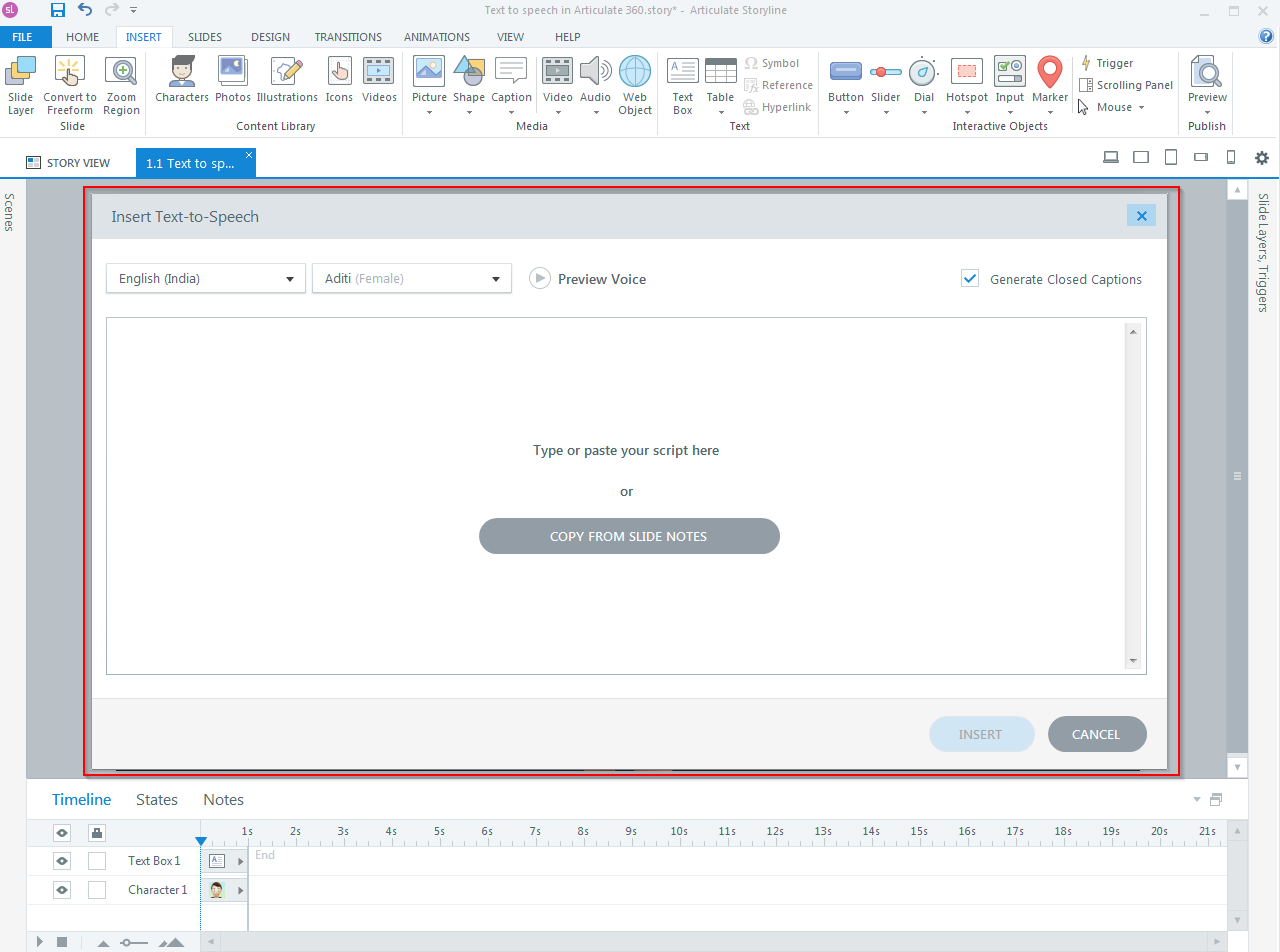
Click on Insert button. Click on Audio icon and choose “Text-to-speech” option which will open a popup window.

Text-to-speech-in-Articulate-360_img_001

Text-to-speech-in-Articulate-360_img_002

Step 2

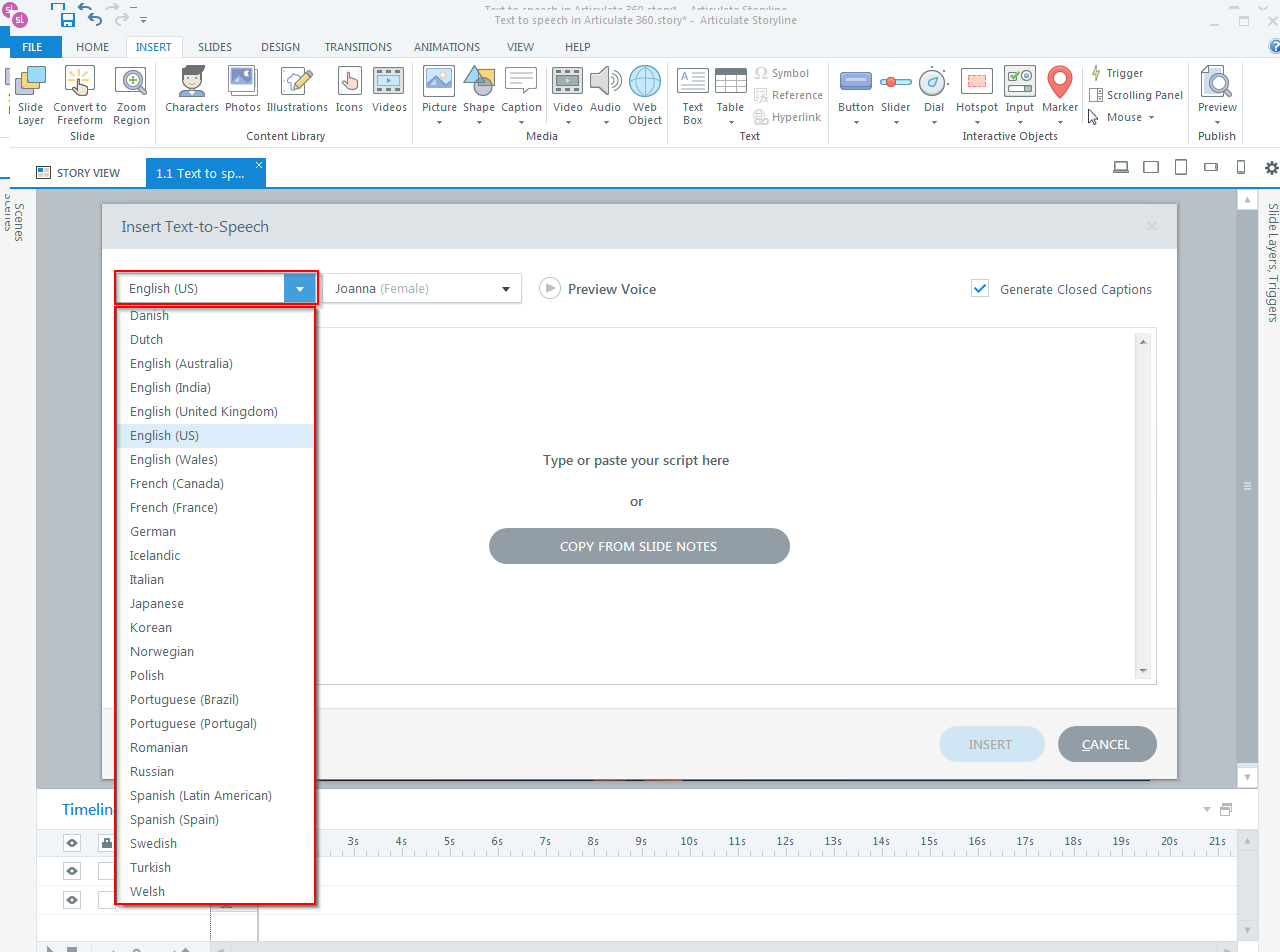
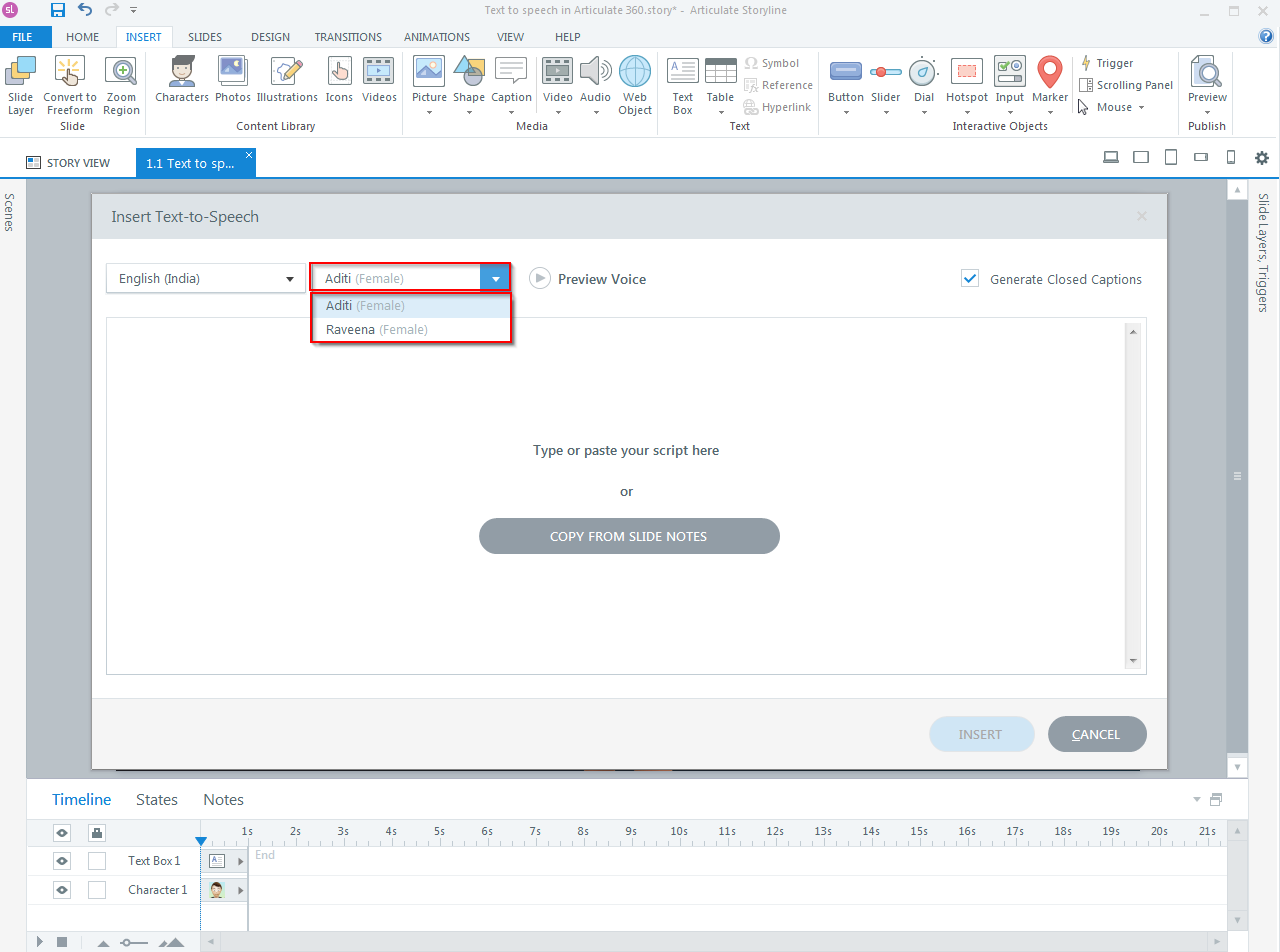
Select the language and the narrator.

Select language:

Text-to-speech-in-Articulate-360_img_003

Select narrator:

Text-to-speech-in-Articulate-360_img_004

Step 3

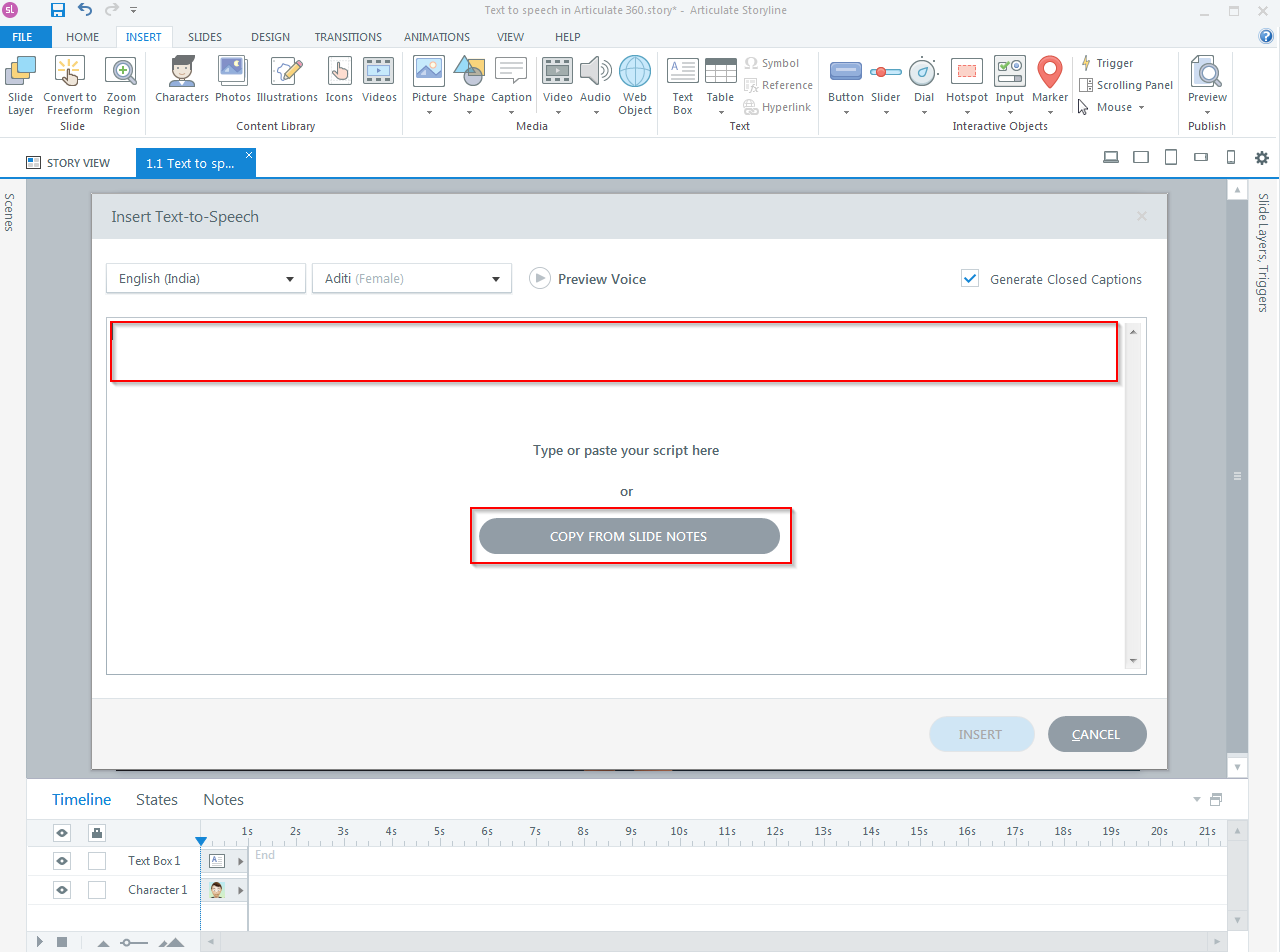
There are two options to add the audio script:

  1. Type or paste the text in the input field (OR)
  2. Import from slide notes by clicking “COPY FROM SLIDE NOTES”.

Text-to-speech-in-Articulate-360_img_005

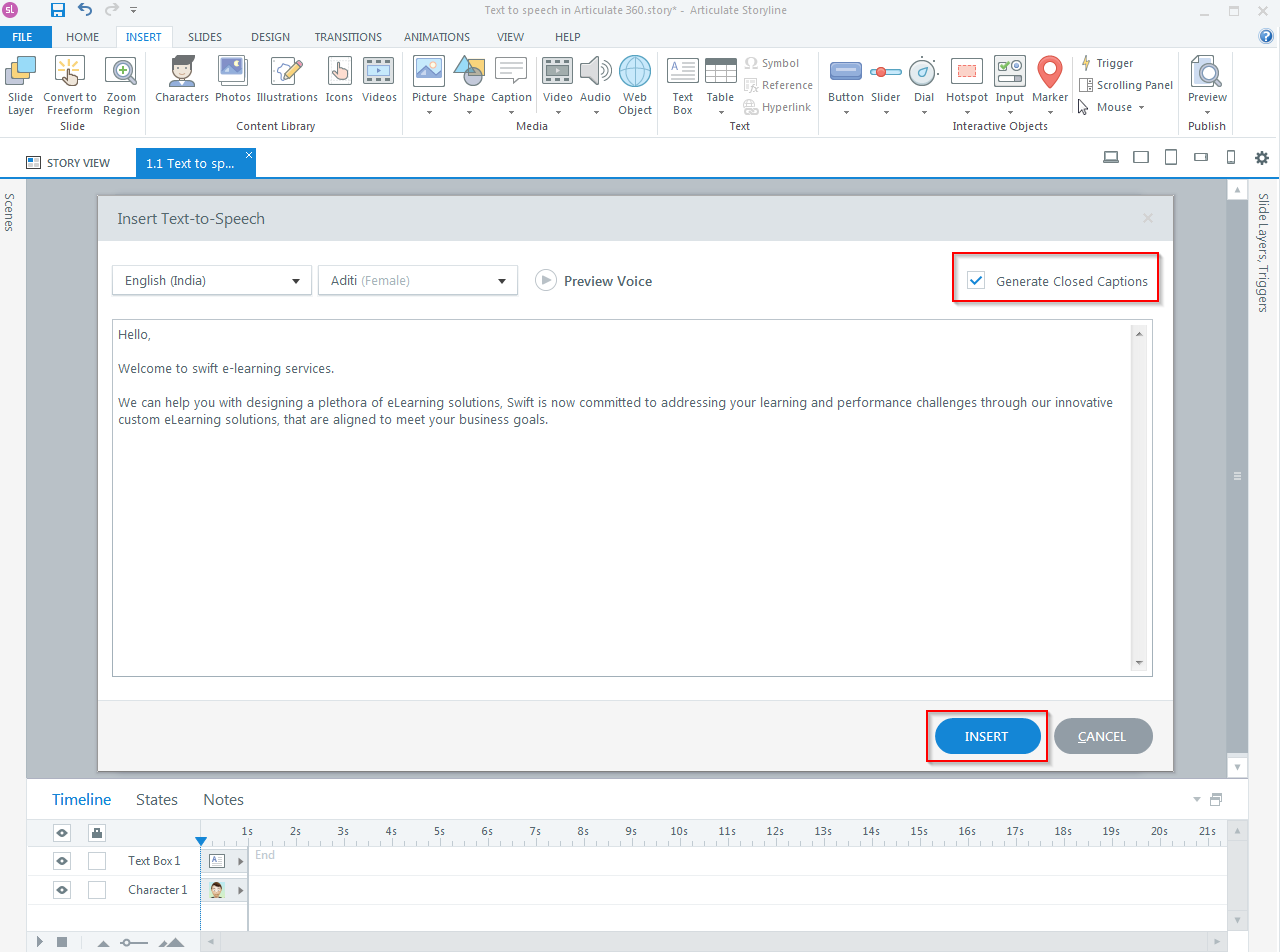
Enable the option “Generate Closed Caption” if CC text is required on the screen. And finally click “INSERT”.

Text-to-speech-in-Articulate-360_img_006

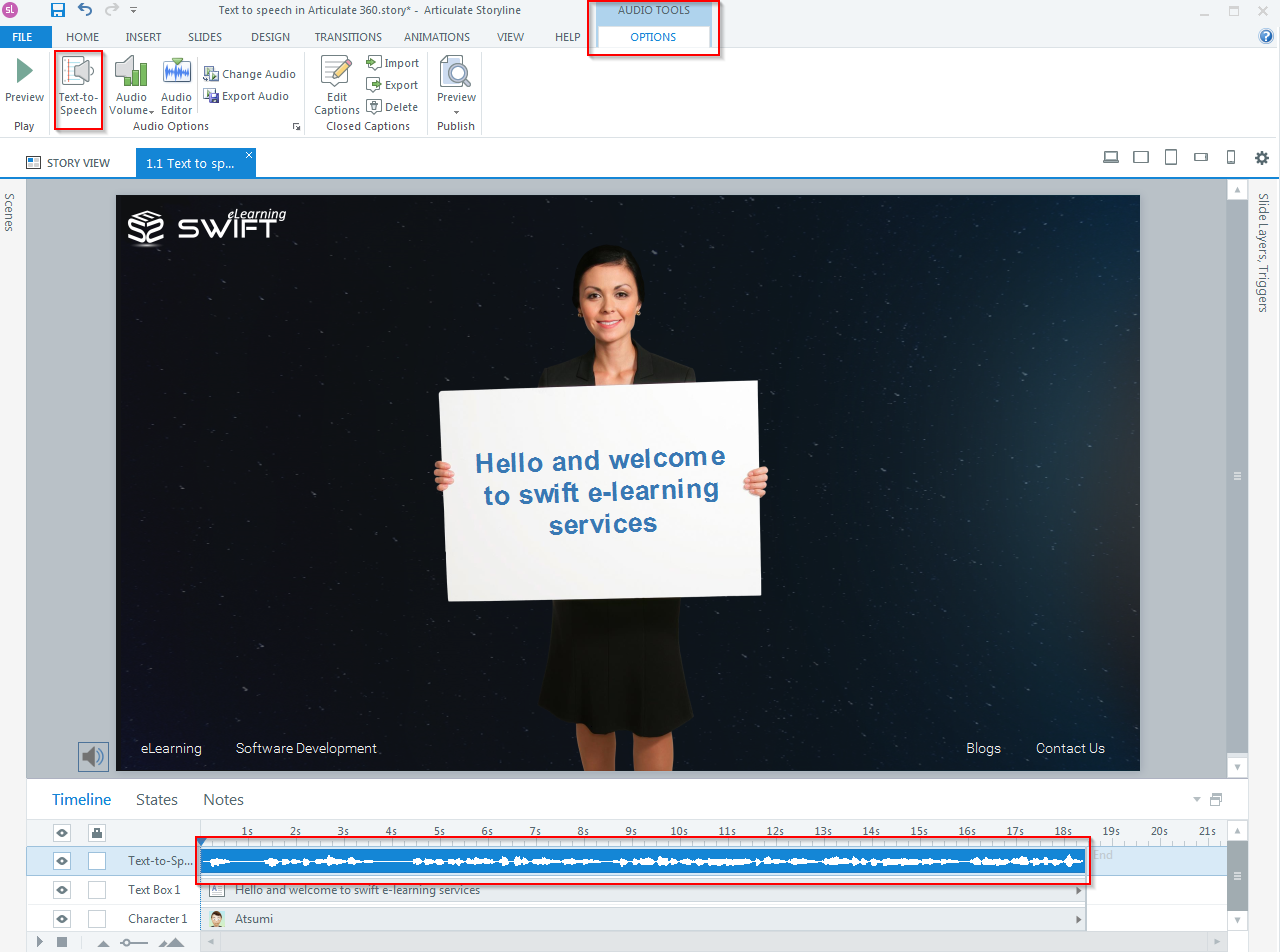
To modify the audio, select the audio layer, click on “AUDIO TOOLS > OPTIONS” and then select “Text-to-Speech” icon.

Text-to-speech-in-Articulate-360_img_007

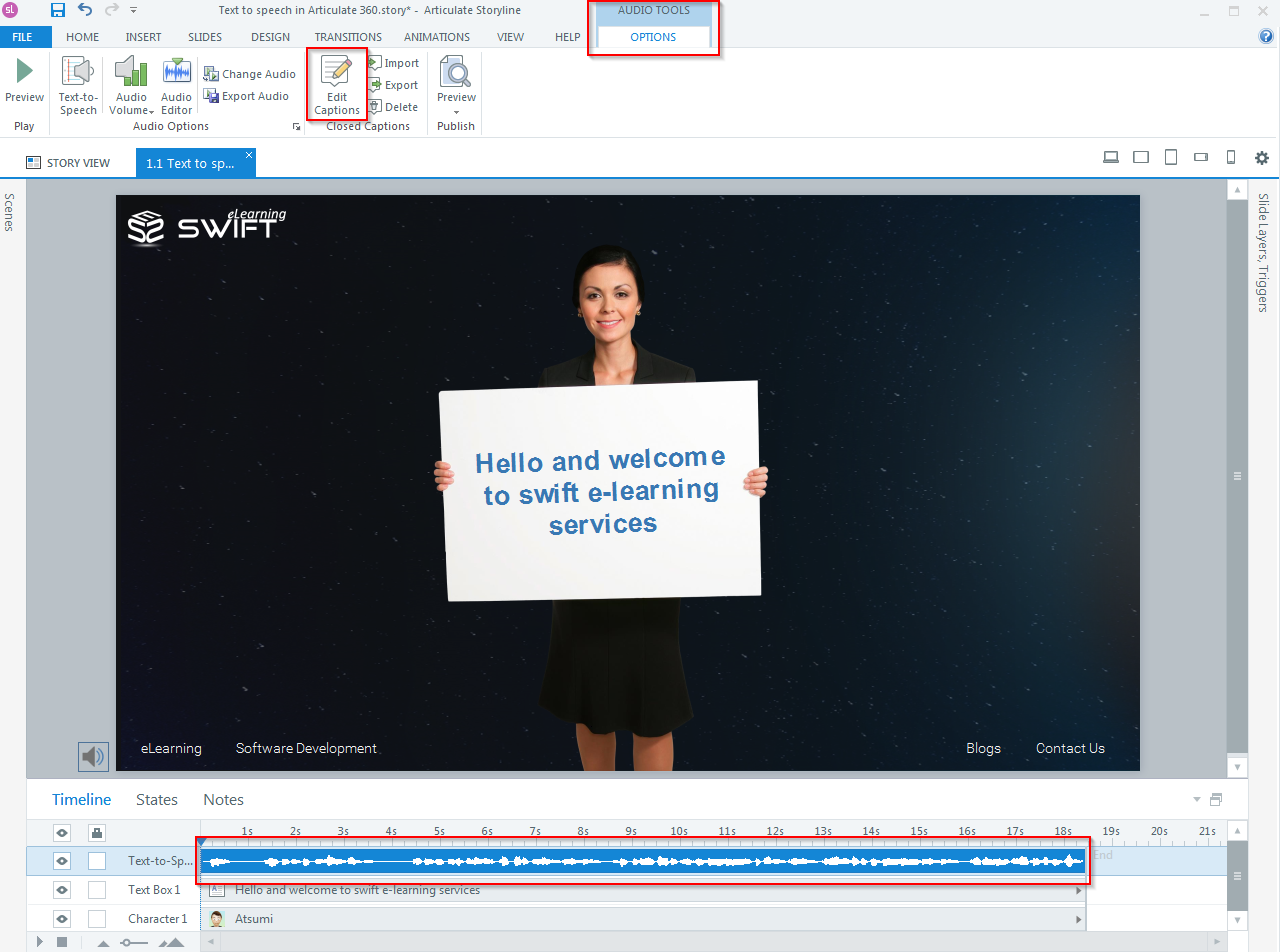
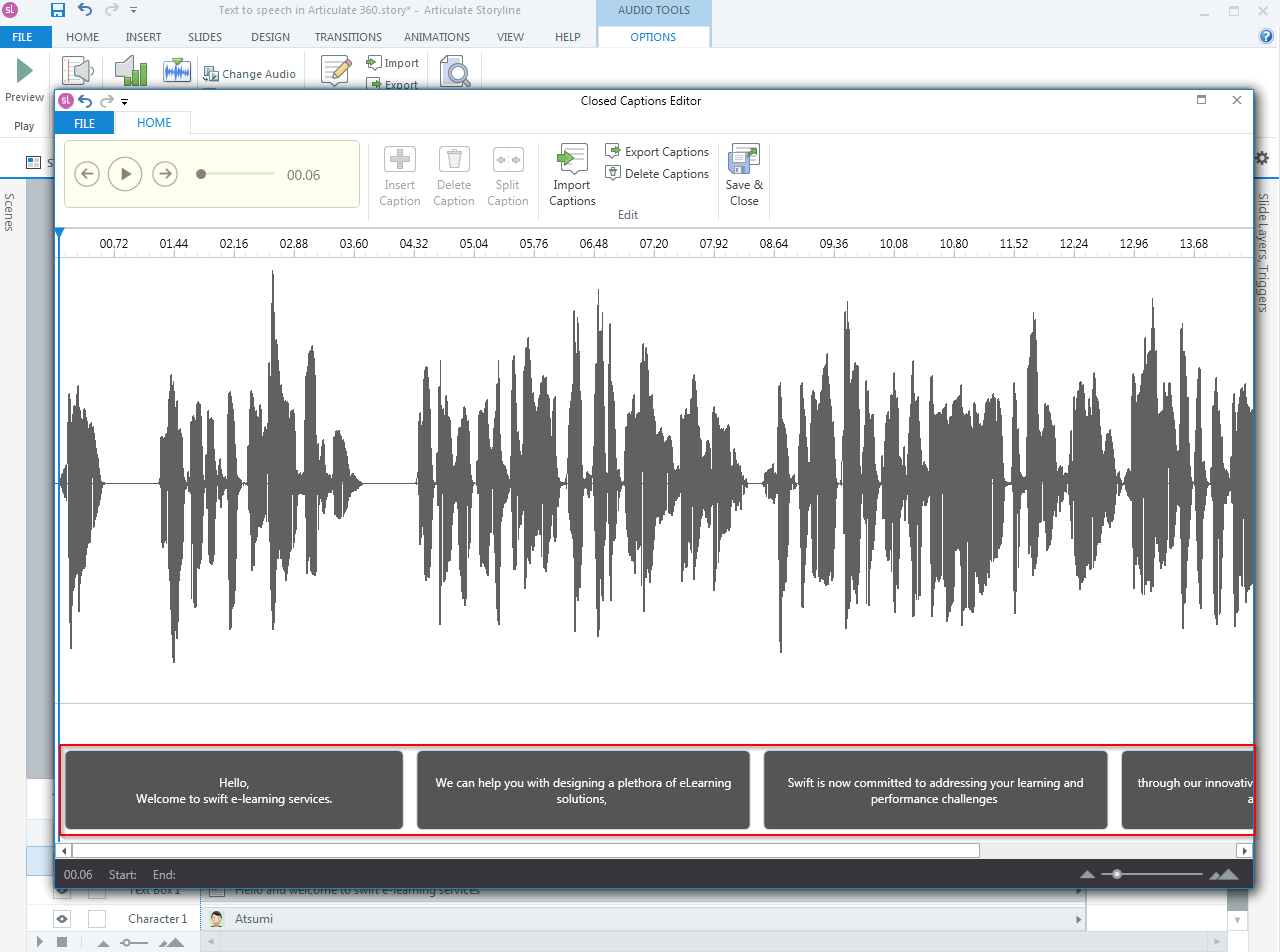
Similarly to edit “Captions” style, click on “AUDIO TOOLS > OPTIONS” and then select “Edit Captions” icon.

Text-to-speech-in-Articulate-360_img_008

Here, we can adjust, delete and modify the caption text.

Text-to-speech-in-Articulate-360_img_009

After editing, click on “Save & Close” button.

Finally, preview the slide to see the output.


Watch this youtube tutorial:

Our Services: Custom eLearning Development, Flash to HTML5 Conversion Services, eLearning Company

0 replies

Leave a Reply

Want to join the discussion?
Feel free to contribute!

Leave a Reply

Your email address will not be published. Required fields are marked *