How to Create Animated Subtitles in Animaker
Click or tap on the play button below to watch the video for easier understanding.
Creating animated subtitles in Animaker is a straightforward process that enhances the visual appeal of your videos and ensures better engagement from your audience. Animaker is a user-friendly online animation tool that enables you to add dynamic subtitles to your videos, making them more engaging and informative.
Embark on a journey of creative expression and enhanced engagement as we guide you through the seamless process of creating animated subtitles in Animaker. This dynamic online animation tool caters to various needs, ranging from rapid eLearning solutions to custom eLearning development. Elevate your videos and captivate your audience by incorporating animated subtitles that not only inform but also entertain.
In this guide, we’ll walk you through the step-by-step process of creating animated subtitles in Animaker, empowering you to elevate your videos to the next level. Whether you’re a seasoned content creator or just starting out, buckle up as we explore the exciting world of animated subtitles and discover how Animaker can be your go-to tool for this creative endeavor.
Here’s a step-by-step guide on creating animated subtitles in Animaker:
Step 1:
Launch ‘Animaker’ in your web browser and log in with your credentials.
Step 2:
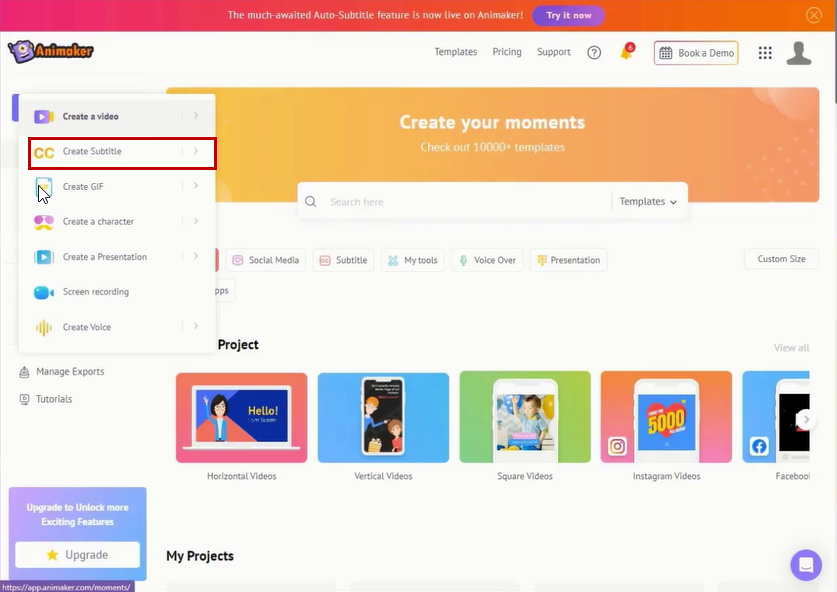
Navigate to the ‘Create’ tab in the left-side menu.
Step 3:
Select ‘Create Subtitle’ from the options list.
Step 4:
Upload the required video by clicking the ‘Upload your file’ button.
Step 5:
Choose a ‘Video’ and then click ‘Open’.
Step 6:
Access the ‘Auto Subtitle’ tab from the left side panel.
Step 7:
Initiate subtitle generation by clicking the ‘Generate Subtitles’ button.
Step 8:
Once subtitles are generated, click the ‘Style’ icon in the left-side panel.
Step 9:
Customize subtitle style in the dedicated section, adjusting options such as font style, size, and colour for both subtitles and text.
Step 10:
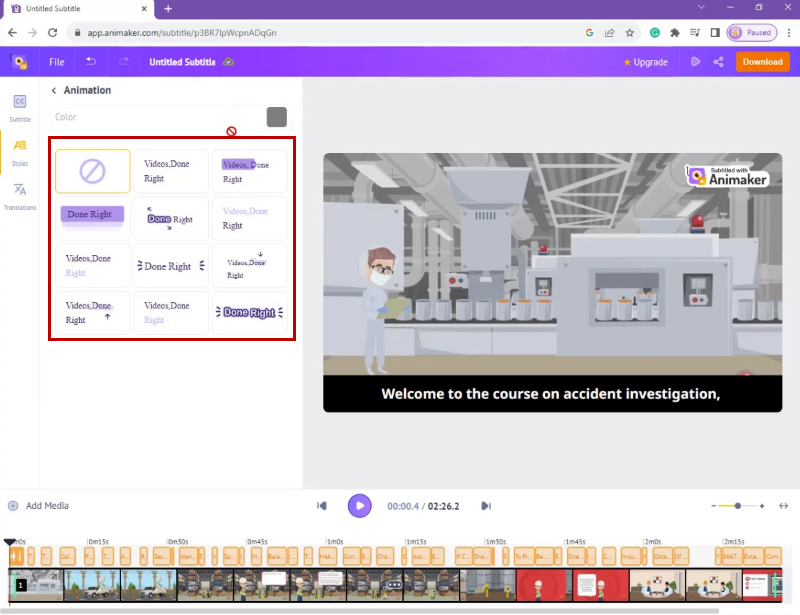
If you select a style from the list, click the ‘Animation’ button at the top of the screen.
Step 11:
Explore various subtitle animations in the Animation section, selecting the option that best suits your needs.
Step 12:
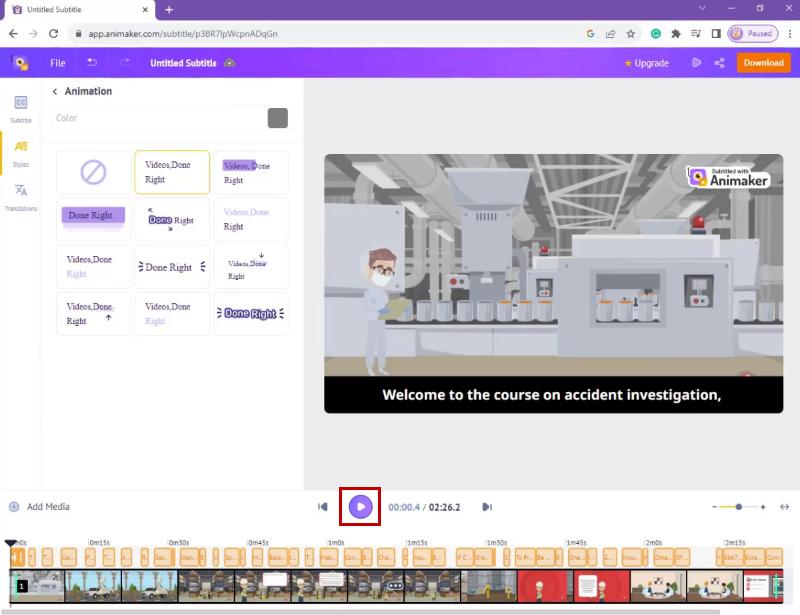
After choosing an animation, preview the video by clicking the ‘play’ button.
Conclusion
In conclusion, Animaker proves to be an invaluable tool for creating animated subtitles, especially in the realm of eLearning development and corporate learning solutions.
By following this step-by-step guide, you can elevate your videos, making them not only visually appealing but also enriching educational experiences. Whether delving into custom eLearning solutions or exploring rapid eLearning development, Animaker empowers you to craft compelling videos that captivate and inform your audience effectively. Unlock the potential of animated subtitles with Animaker and witness the transformative impact on your eLearning content.


Leave a Reply
Want to join the discussion?Feel free to contribute!