How to create branched interactions in Latest Adobe Captivate
Click or tap on the play button below to watch the video for easier understanding.
Branched interactions are a type of eLearning activity that allows learners to make choices and follow different paths through the learning material. This can help to create a more engaging and personalized learning experience, and to better assess learners’ progress.
In this blog, we will guide you through a step-by-step process for implementing branched interactions in the latest version of Adobe Captivate.
Step 1:
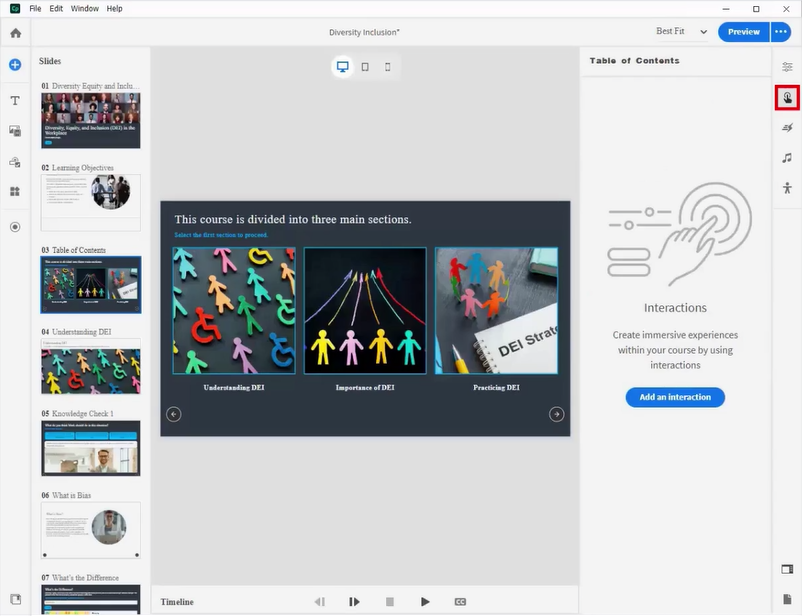
Open Adobe Captivate course and create a slide with three clickable buttons, include a “Next and Previous” buttons for navigation.
Step 2:
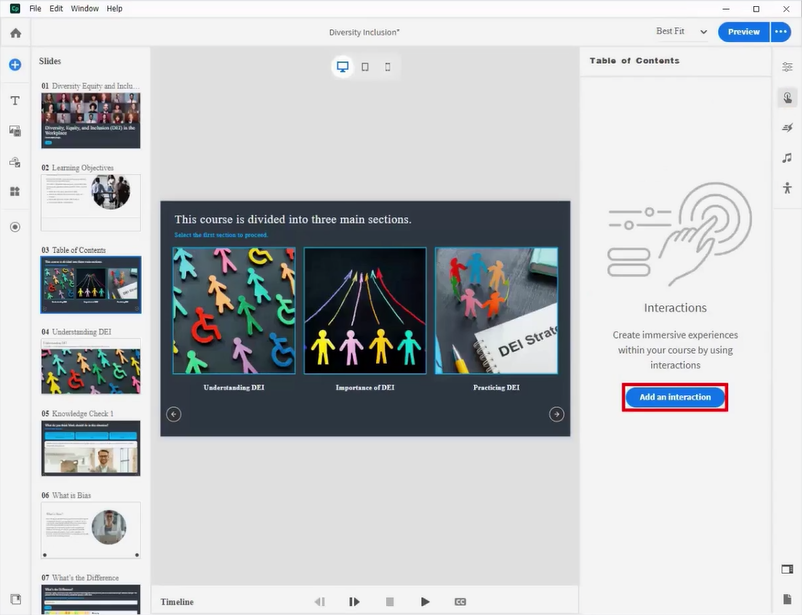
Disable the “Next” button on the “Table of Contents” by utilizing the “Add an Interaction” on the right side of the panel.
Step 3:
Click the “Add an Interaction” button.
Step 4:
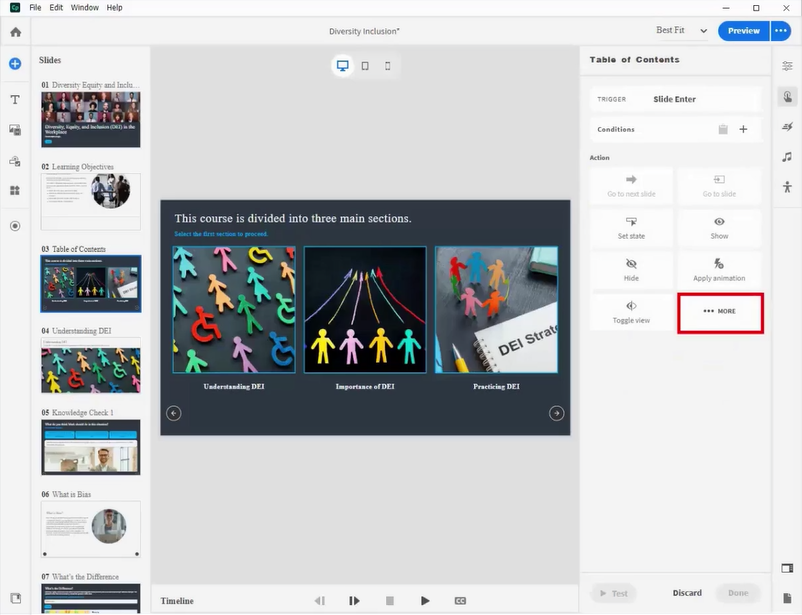
Select the “Slide Enter” option and click on “More“.
Step 5:
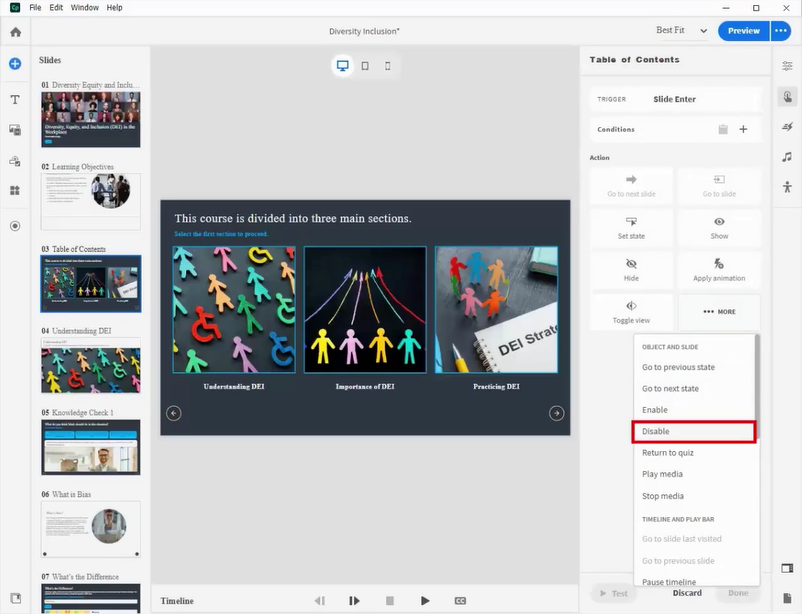
Select “Disable” from the list.
Step 6:
After selecting the “Next” button from the target list, click the “Done” button to save the changes.
Step 7:
Choose the “Next” button and modify its visual state by clicking the “Show” button on the right-side panel.
Step 8:
Right-click on the “Disable” state in the list and choose “Enable”
Step 9:
Select the first button and click the “Add an interaction” icon.
Step 10:
Choose “Click/tap” from the list and opt for the “Go to next slide” action.
Step 11:
Select the target slide from the list and save the action by clicking “Done“.
Step 12:
You can control the states for the clickable buttons by following the same process as you did for the “Next” button.
Step 13:
Navigate to the final slide of the first topic and assign an action to the “Next” button to “Go to slide” which leads to the branching screen.
Step 14:
Click the “Done” button to save the actions.
Step 15:
You can repeat the same process for the remaining two buttons.
Step 16:
Go to the branching slide and create a new action by clicking on the “+ Add new action” option.
Step 17:
To add a conditional action, click the “+” symbol and select “Standard state“.
Step 18:
Include a “Visited” state condition for all three buttons, and select the “Enable” action by clicking on “More“.
Step 19:
Choose the “Next” button from the list, then click “Done” to save the actions.
Save the source file and publish it to observe the slide navigation behavior. When compared to the previous version of Captivate, you’ll find it easier to create branching screens in the latest version.


Leave a Reply
Want to join the discussion?Feel free to contribute!