How to Fill a Background Using the ‘Select Inverse’ Feature in Adobe Photoshop
Click or tap on the play button below to watch the video for easier understanding.
In the dynamic world of digital image editing, Adobe Photoshop stands as a timeless titan. With its multitude of tools and features, it empowers creators to breathe life into their artistic visions.
Among the arsenal of capabilities that Photoshop provides, the ‘Select Inverse’ feature is a secret weapon for those looking to enhance their compositions and experiment with new creative possibilities. This feature allows you to easily fill a background, swap selections, and create unique effects in your images.
This blog is your gateway to understanding and effectively employing the ‘Select Inverse’ feature, particularly when it comes to filling backgrounds in your images.
Whether you’re a novice eager to elevate your skills or a seasoned pro searching for fresh techniques, this guide will help you unlock the full potential of this powerful tool. And, for those involved in eLearning solutions or custom eLearning development, the ‘Select Inverse’ feature can be a valuable asset for creating compelling visuals within custom eLearning course development.
In this guide, we’ll walk you through the steps to effectively use the ‘Select Inverse’ feature in Adobe Photoshop, enabling you to enhance your creative images.
Step 1:
Open ‘Adobe Photoshop’ and load an image.
Step 2:
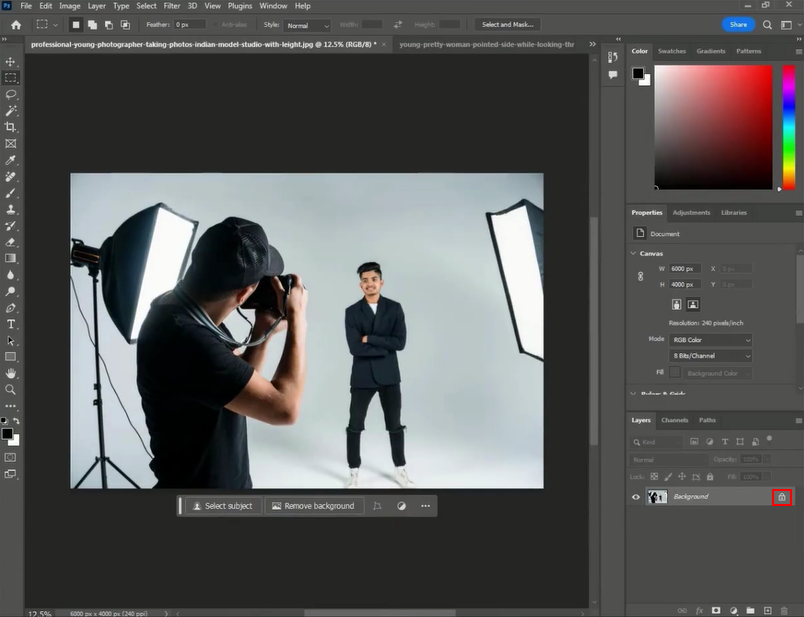
Unlock the image layer by clicking the ‘Lock’ icon.
Step 3:
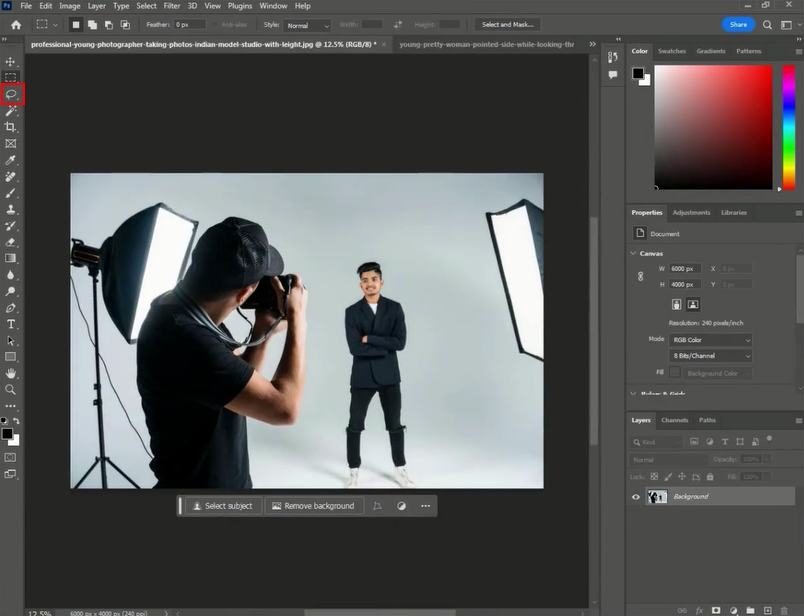
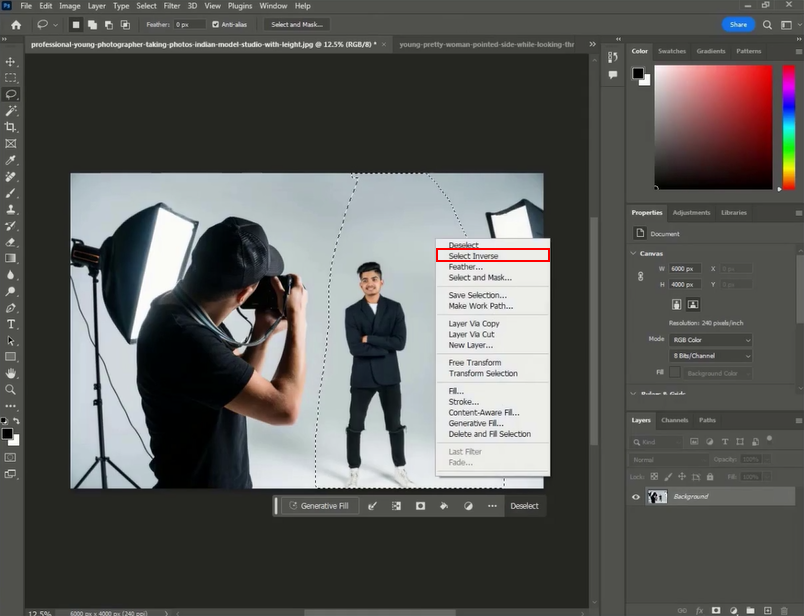
Utilize the ‘Lasso Tool’ from the left-side panel to select the area you want to use for the background fill.
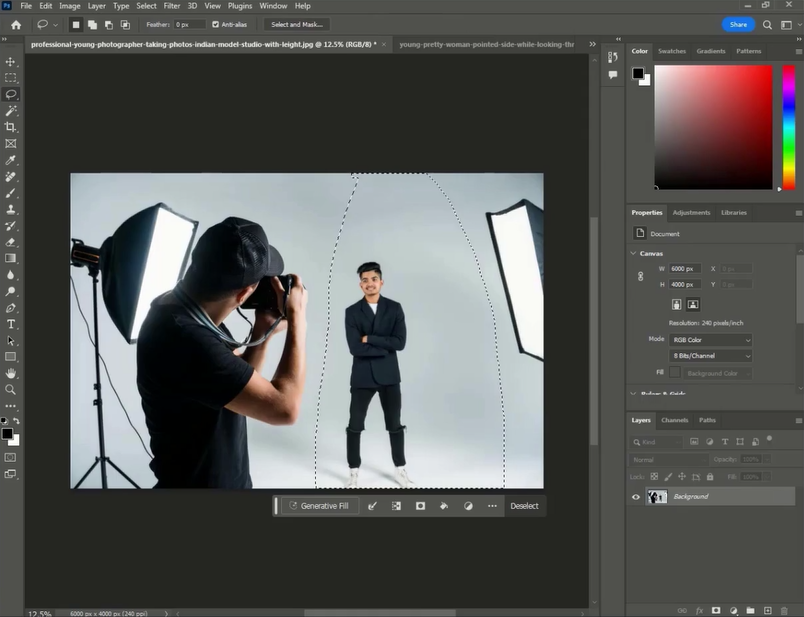
In this instance, we’re removing the lights on the left and right sides as well as the photographer. We’ll be using the ‘Select Inverse’ option to fill the background in their place.
Step 4:
Right-click on the image and choose ‘Select Inverse’ from the menu.
This will select everything except the initially outlined image.
Step 5:
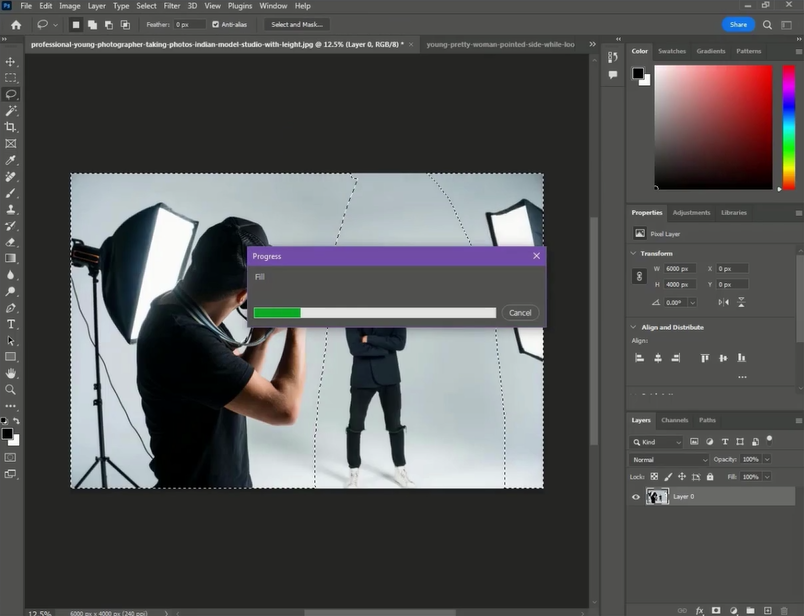
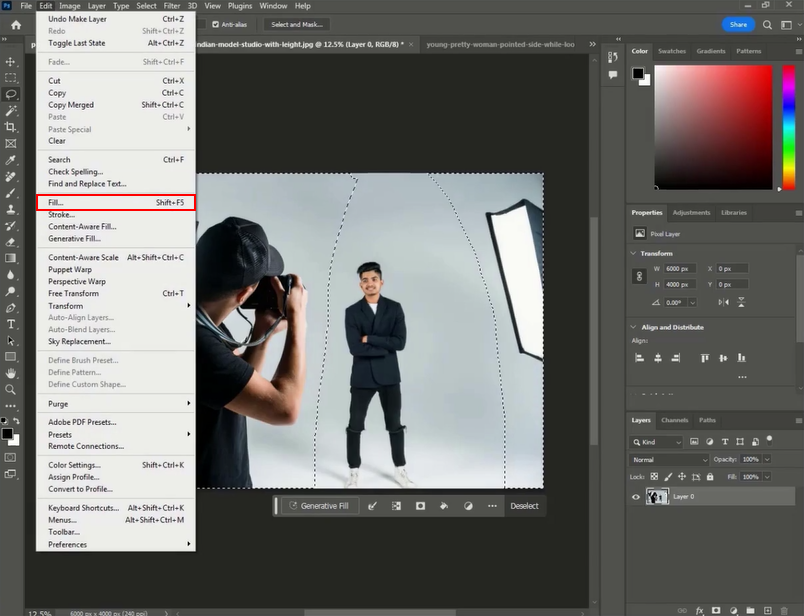
Navigate to the top ribbon and click on ‘Edit’, then choose ‘Fill’ from the options.
Step 6:
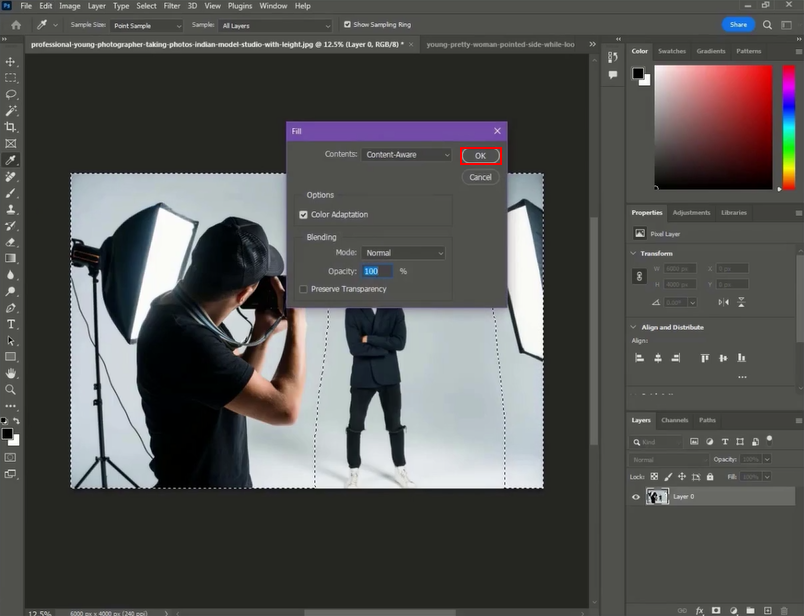
Confirm that the Content-Aware option is selected, and then click ‘OK’.
Step 7:
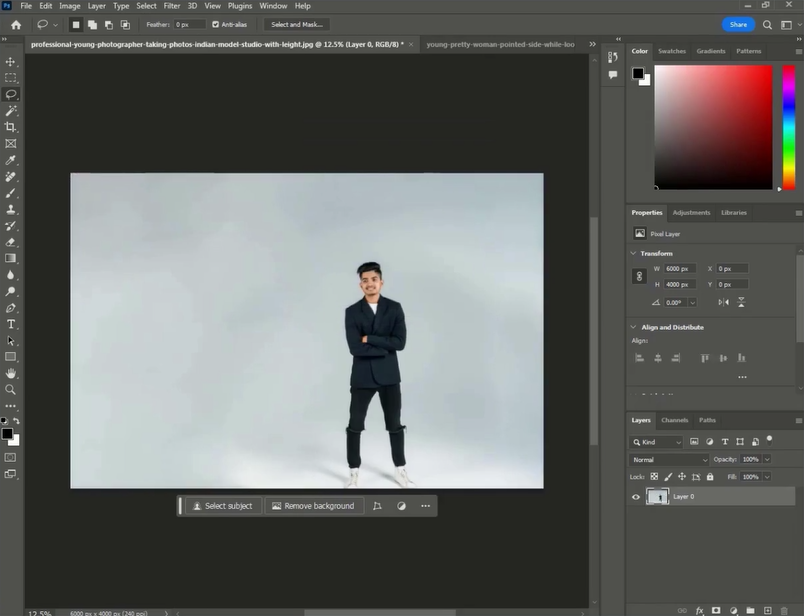
Once the process is complete, you’ll observe the selected elements filled with the background.
Conclusion:
The ‘Select Inverse’ feature in Adobe Photoshop is an indispensable asset in the toolkit of any image editor, designer, or artist. It’s a key that opens the door to endless possibilities, enabling you to seamlessly transform backgrounds, swap selections, and craft stunning visual effects.
Regardless of your level of expertise, this feature invites you to delve deeper into the world of digital art and design. As you master the ‘Select Inverse’ technique, your ability to tell compelling visual stories will know no bounds. So, embrace the creative freedom that this feature provides, and let your imagination run wild as you embark on your journey to create captivating images that leave a lasting impression.
For those engaged in eLearning solutions and Custom eLearning Development, understanding this technique can be a valuable addition to your skill set when creating engaging visuals for custom eLearning course development.







Leave a Reply
Want to join the discussion?Feel free to contribute!